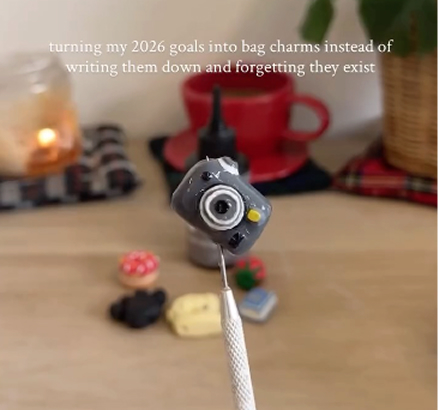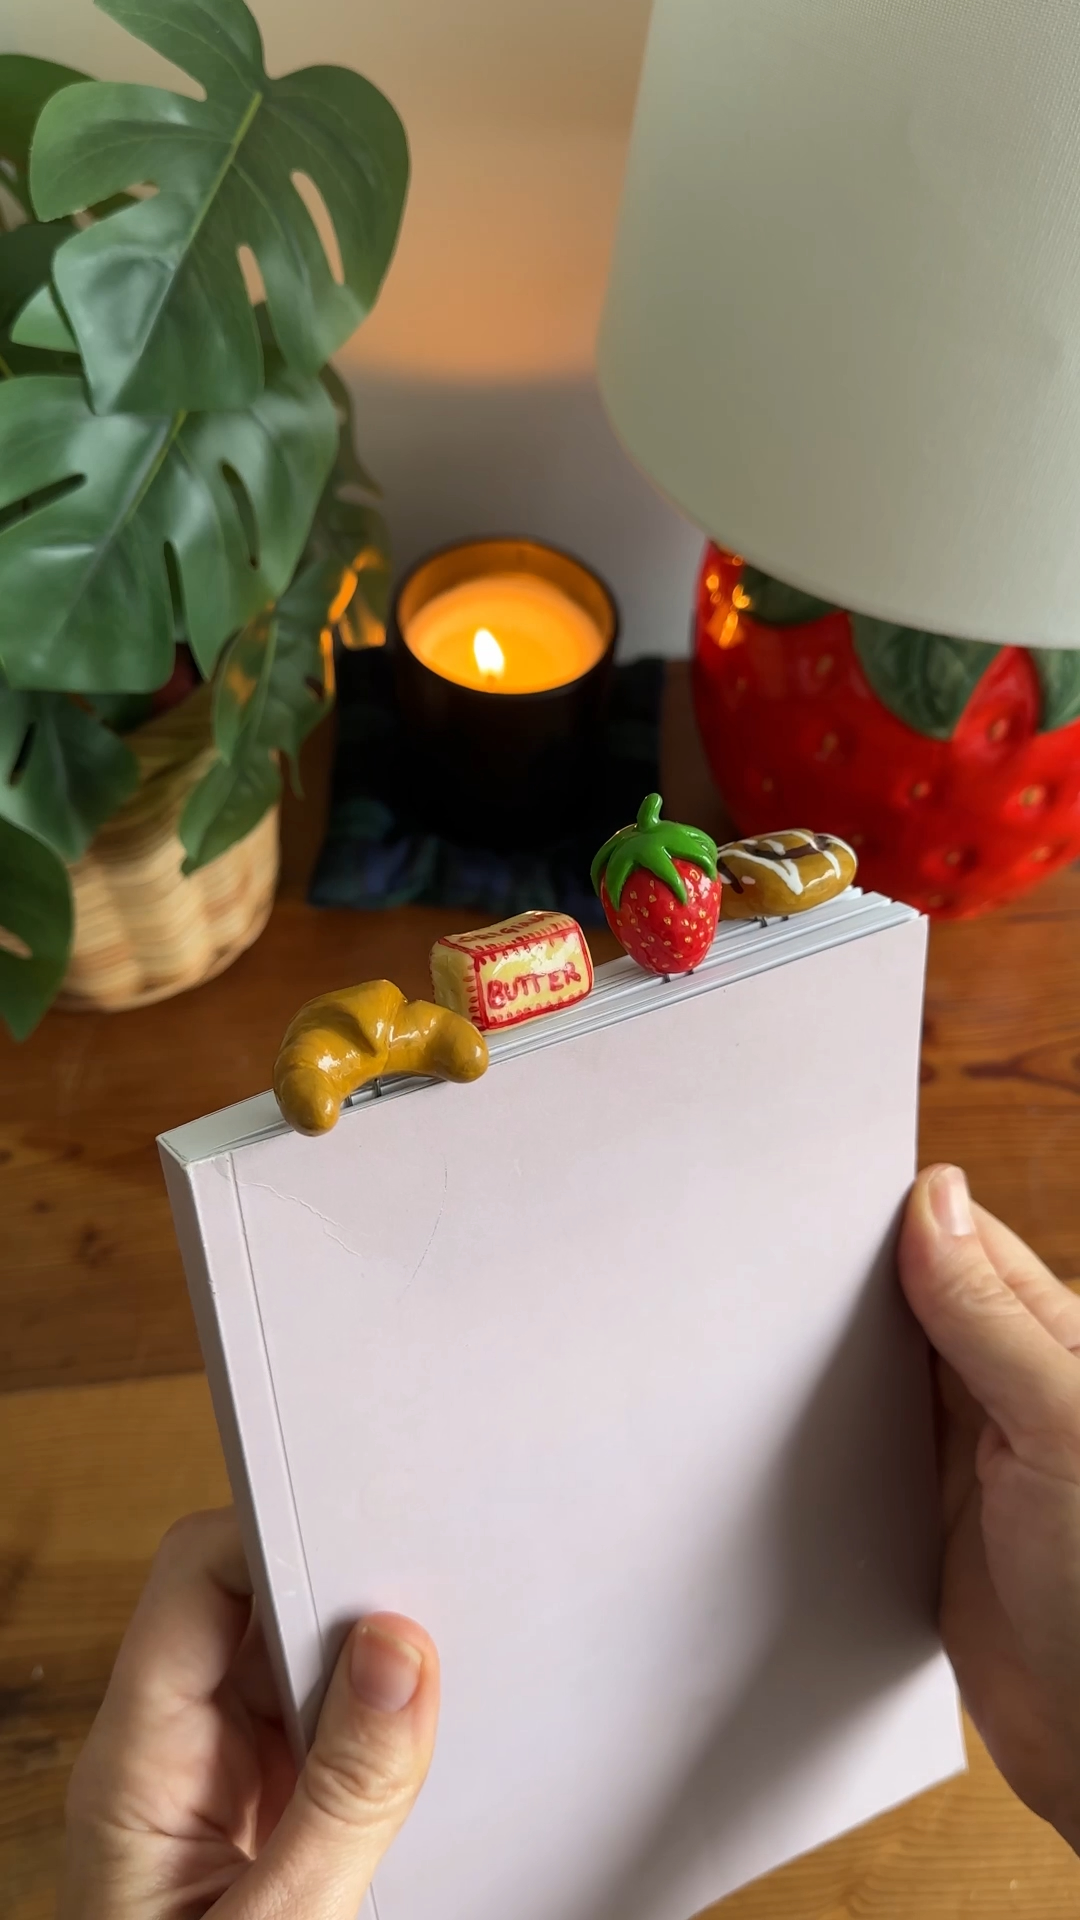
diy polymer clay bookmarks 😍📖
the cutest handmade bookmarks that double as tiny works of art.
🍓 completely customisable to your favourite foods
🎁 perfect handmade gift idea
✨ glossy, satisfying finish
🕯️ cosy craft for a quiet evening
learn how to make DIY polymer clay bookmarks shaped like your favourite foods. this beginner-friendly craft is quick and perfect for gifting. In just a couple of hours, you’ll have glossy, durable bookmarks that add personality to your reading time.
• polymer clay (various colours)
• craft knife
• acrylic paint
• small paintbrush
• paper clips
• super glue
• UV resin
• UV light

welcome to my online studio of arts, crafts and everything in between! i post regular diy crafts here and over on my socials. pop your email in below and i'll send you the free air dry clay starter kit - plus new projects to your inbox every month.
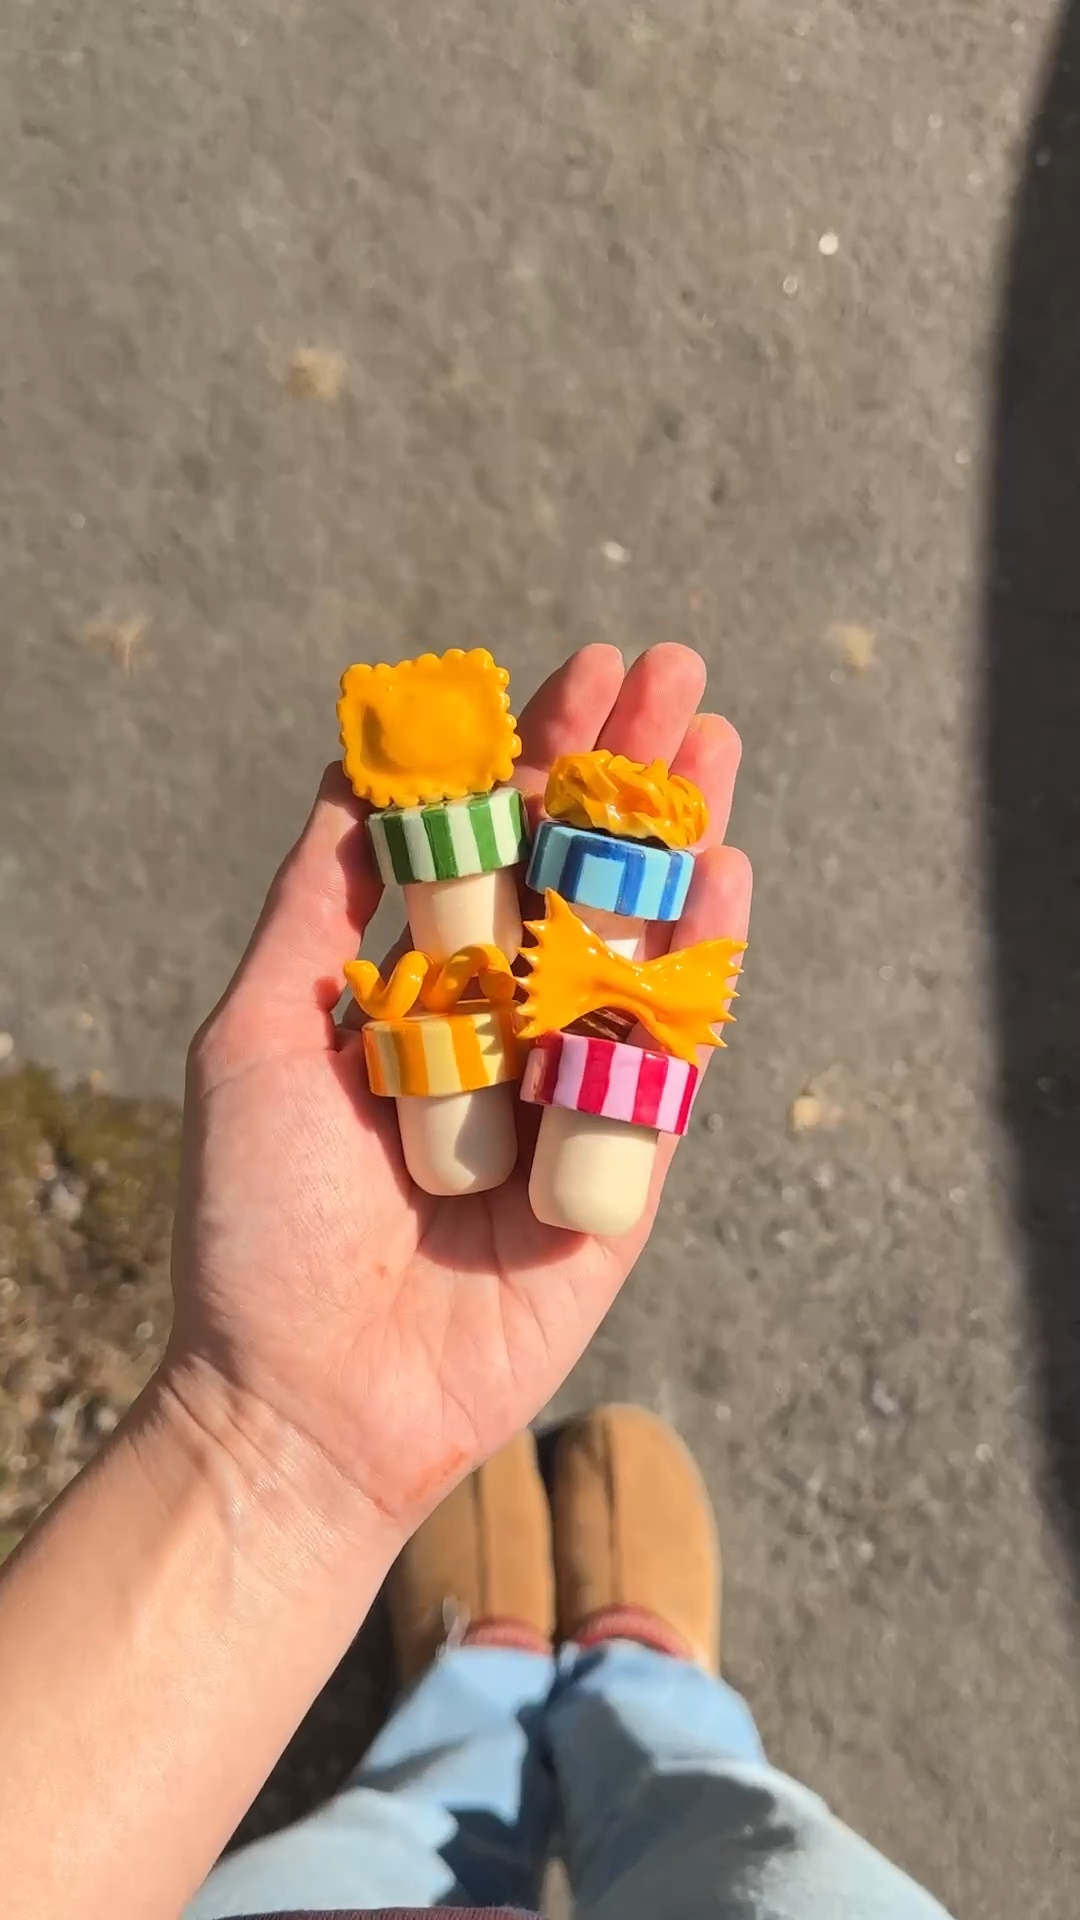
i’ve always loved the kinds of crafts that feel small, cosy, and a bit collectible, and this one started there. bookmarks already feel personal, but making them as tiny foods made the whole idea even more fun.
i wanted them to feel playful without being too delicate to actually use. that balance was the main goal really. something cute enough to gift, but still strong enough to tuck into a book properly. food shapes felt like the perfect direction because they’re familiar, warm, and instantly full of character.
the one part I had to be careful with was the detail. pieces like croissant layers or a cinnamon swirl can go from charming to squashed very quickly if you overwork the clay. but once the shapes started coming together, the whole thing felt really calming.
so I picked a few favourites and started building the set.
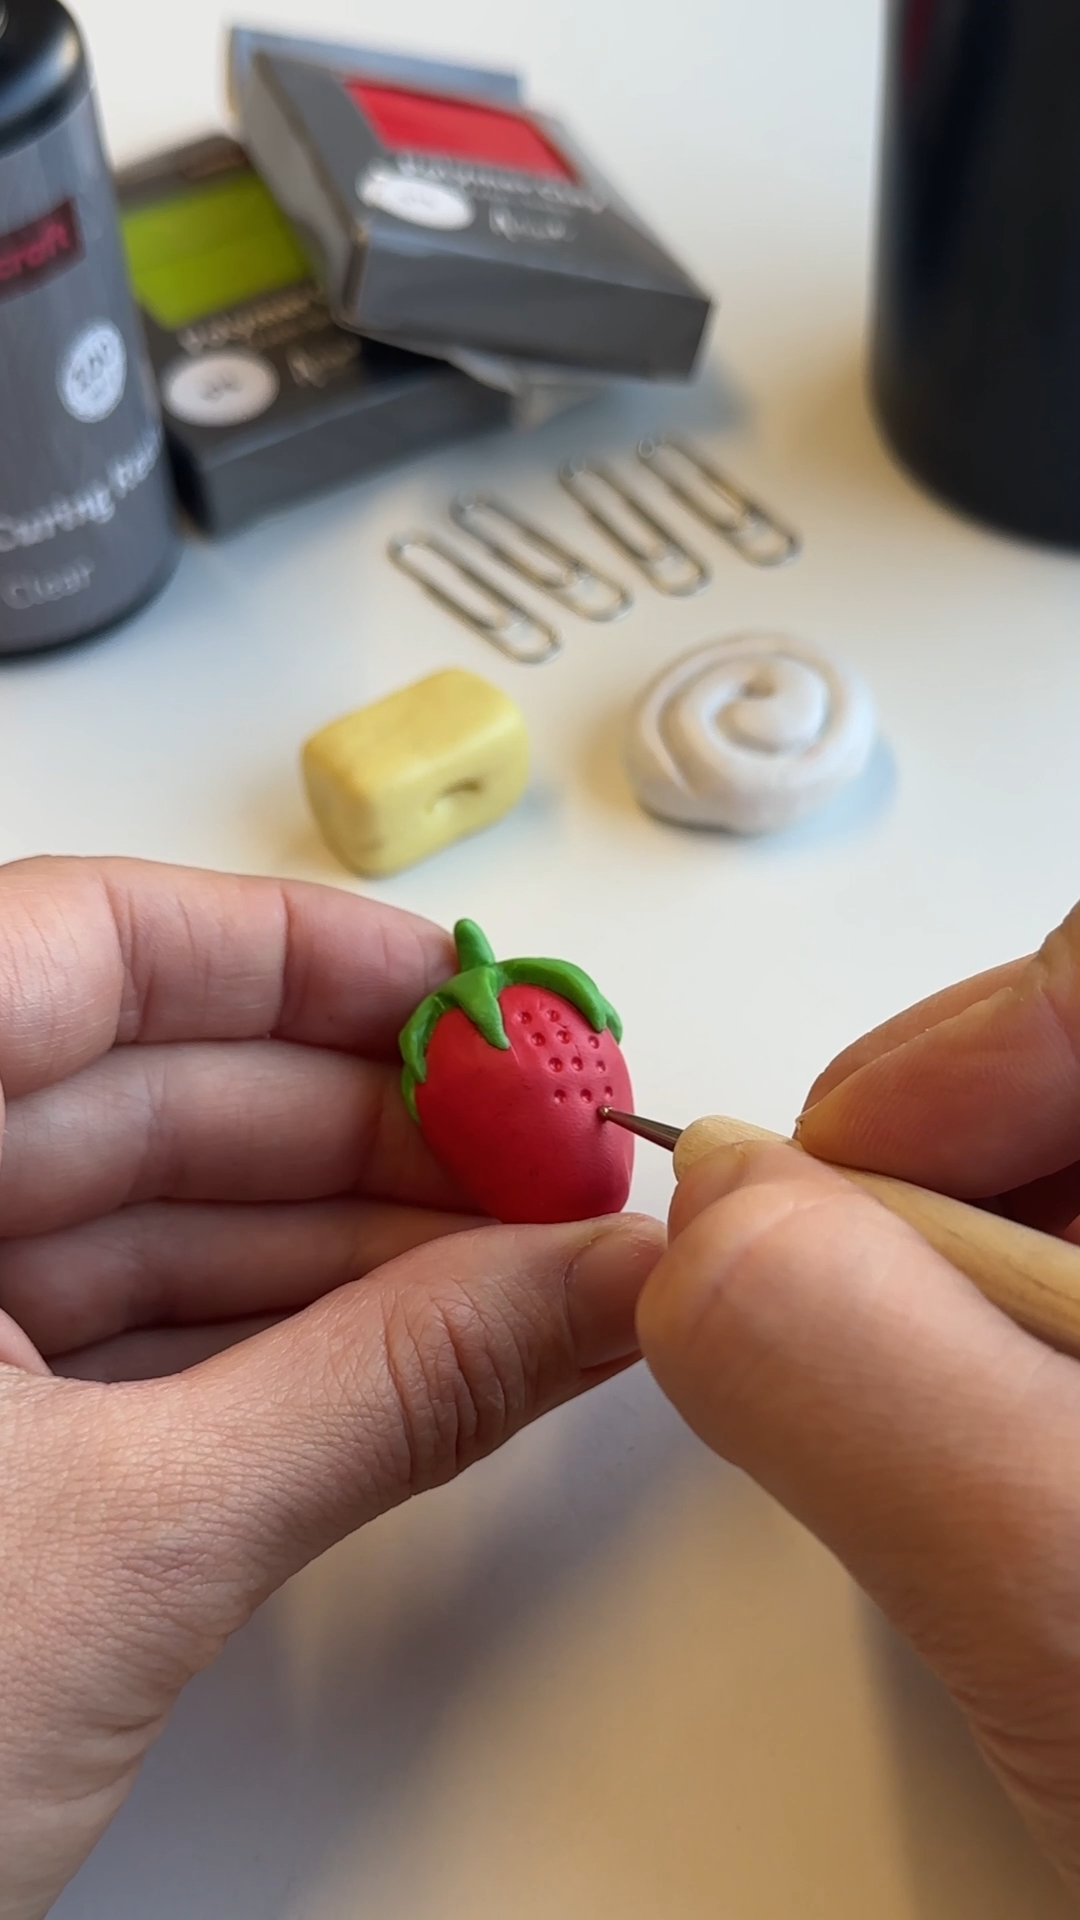
step 1: shape your mini designs
start by rolling and shaping your polymer clay into your chosen designs. I made a croissant, strawberry, cinnamon roll, and a stick of butter.
keep your shapes simple at first, then slowly refine them with your fingers or a tool. this part is really tactile and quite relaxing.

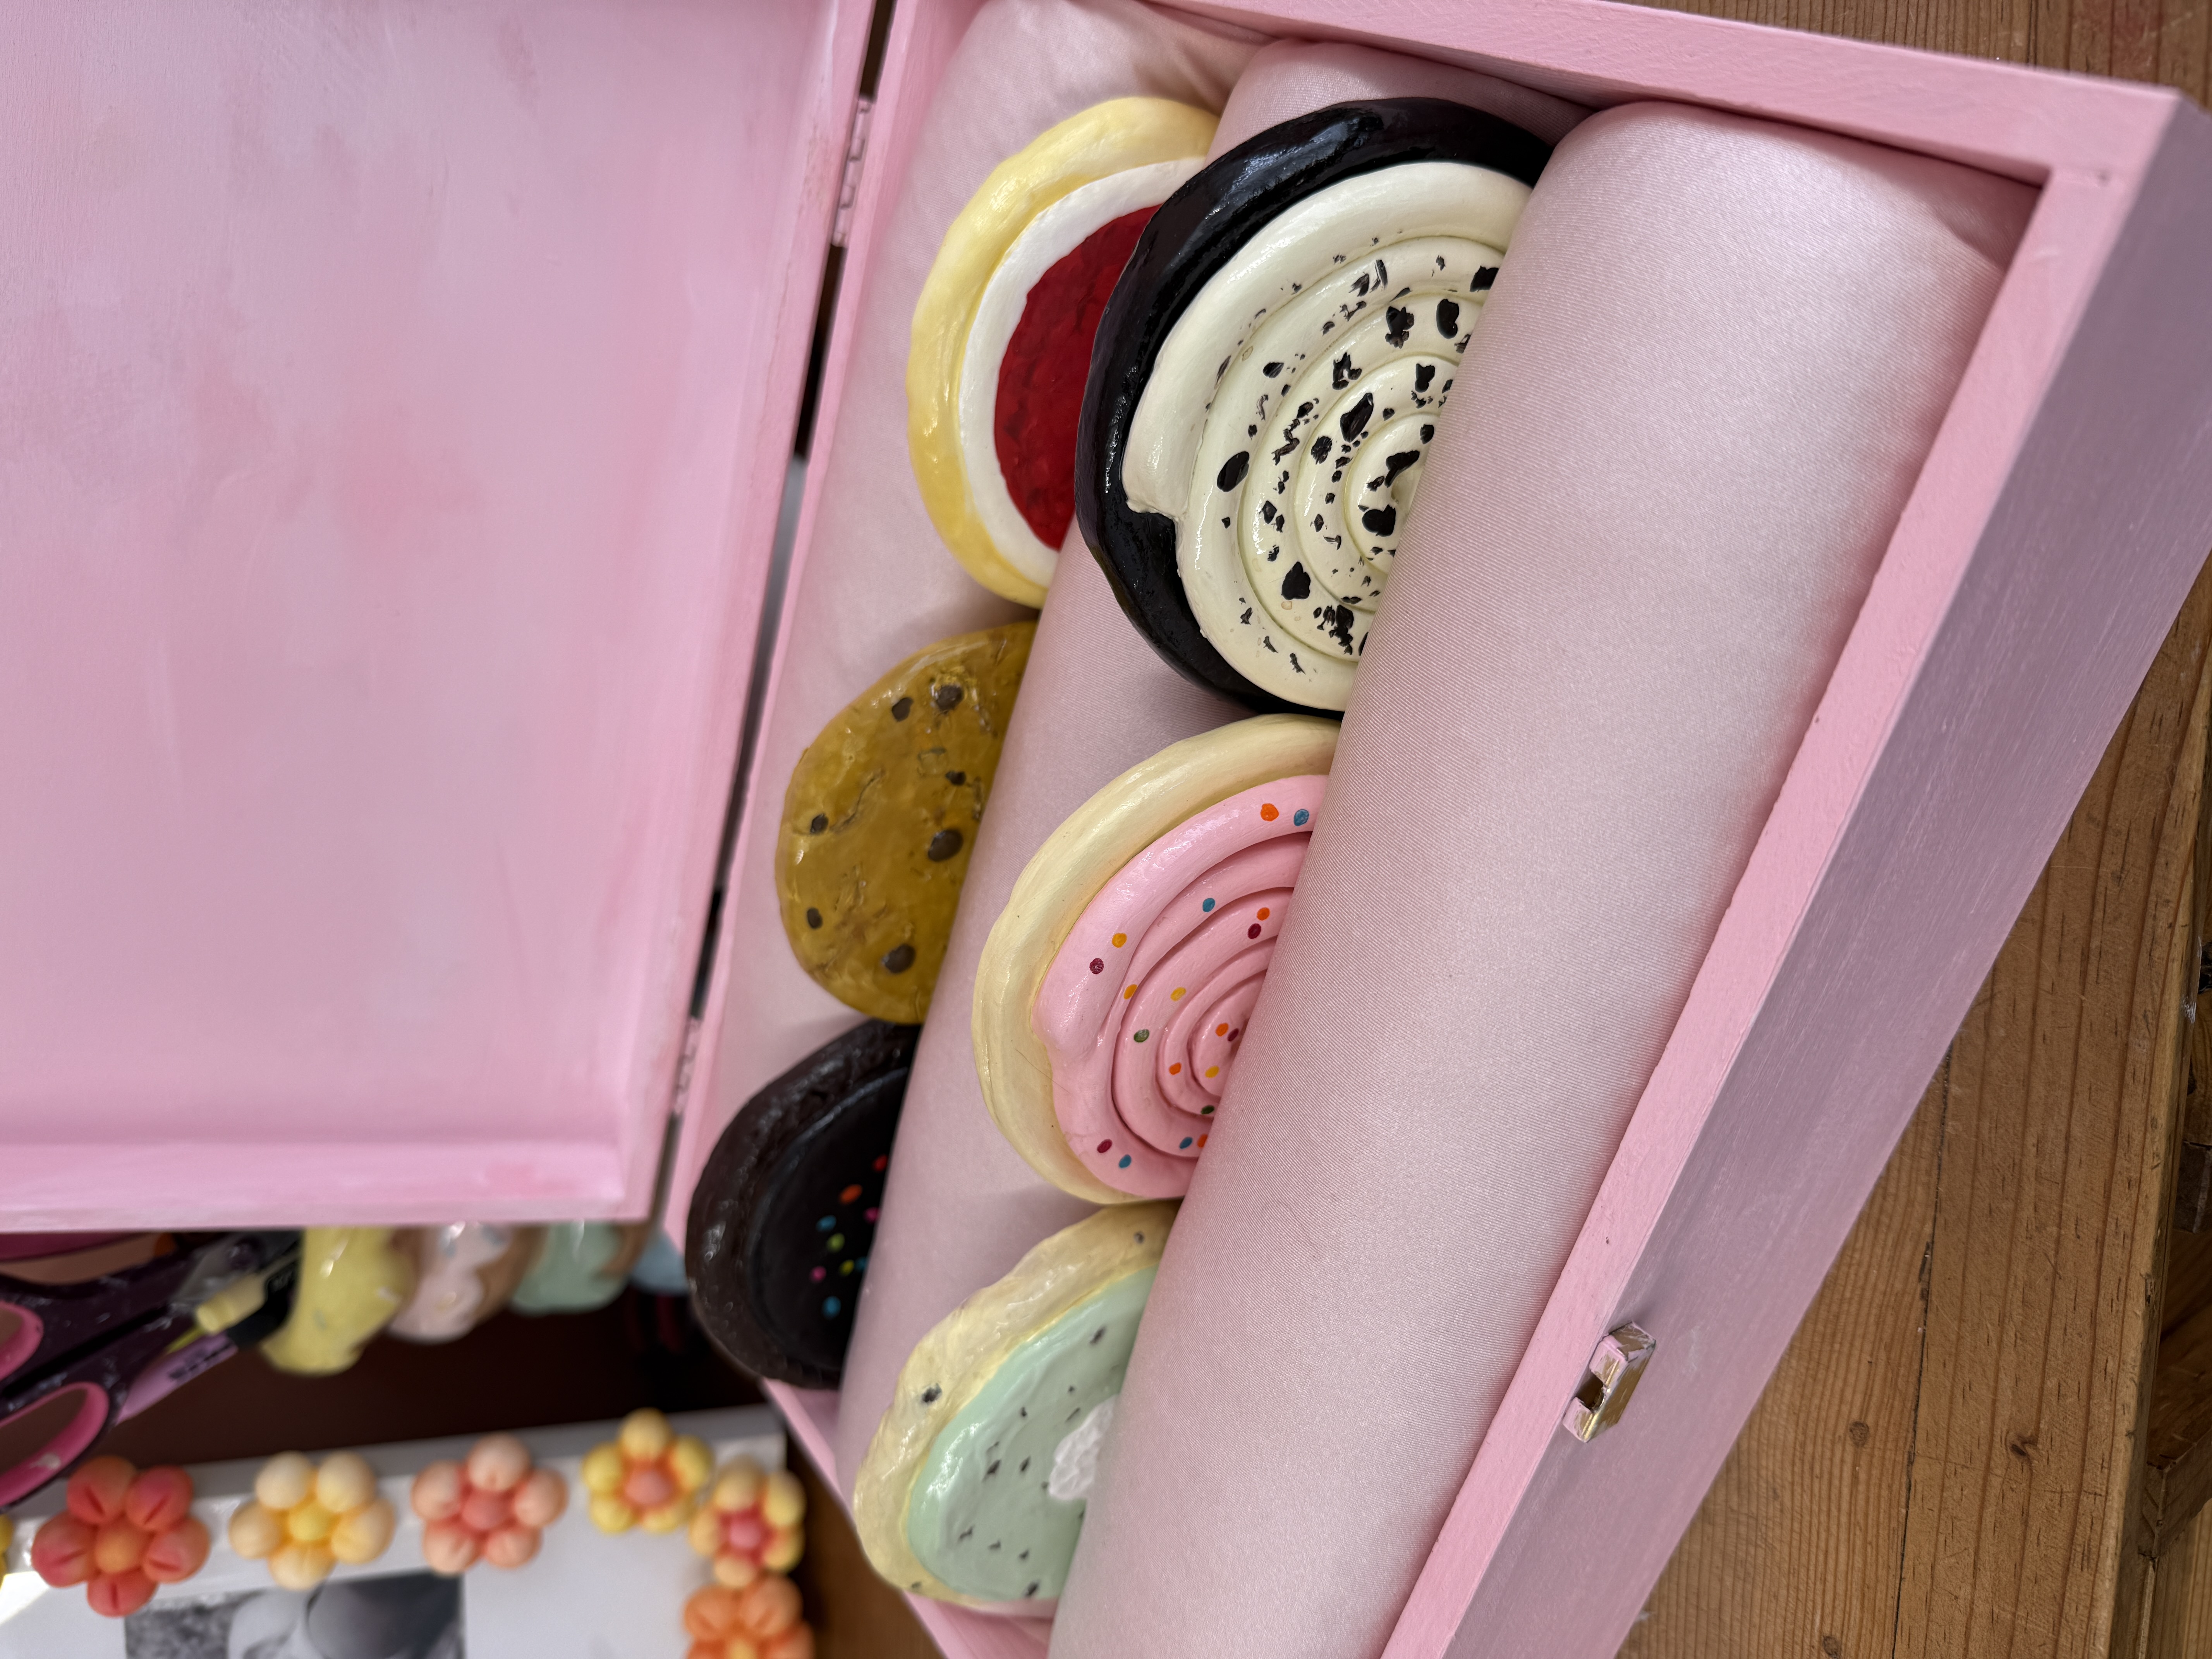
step 2: add texture and details
use a craft knife or small tool to carve in details like swirls, seeds, or layers.
these little touches are what make each piece feel realistic and give them that “mini food” charm.
step 3: bake and harden the clay
once you’re happy with the shapes, bake them in the oven following your clay’s instructions.
after baking, let them cool completely before moving on. they should feel solid and hold their shape.
tip: place them on baking paper to avoid marks on the base.

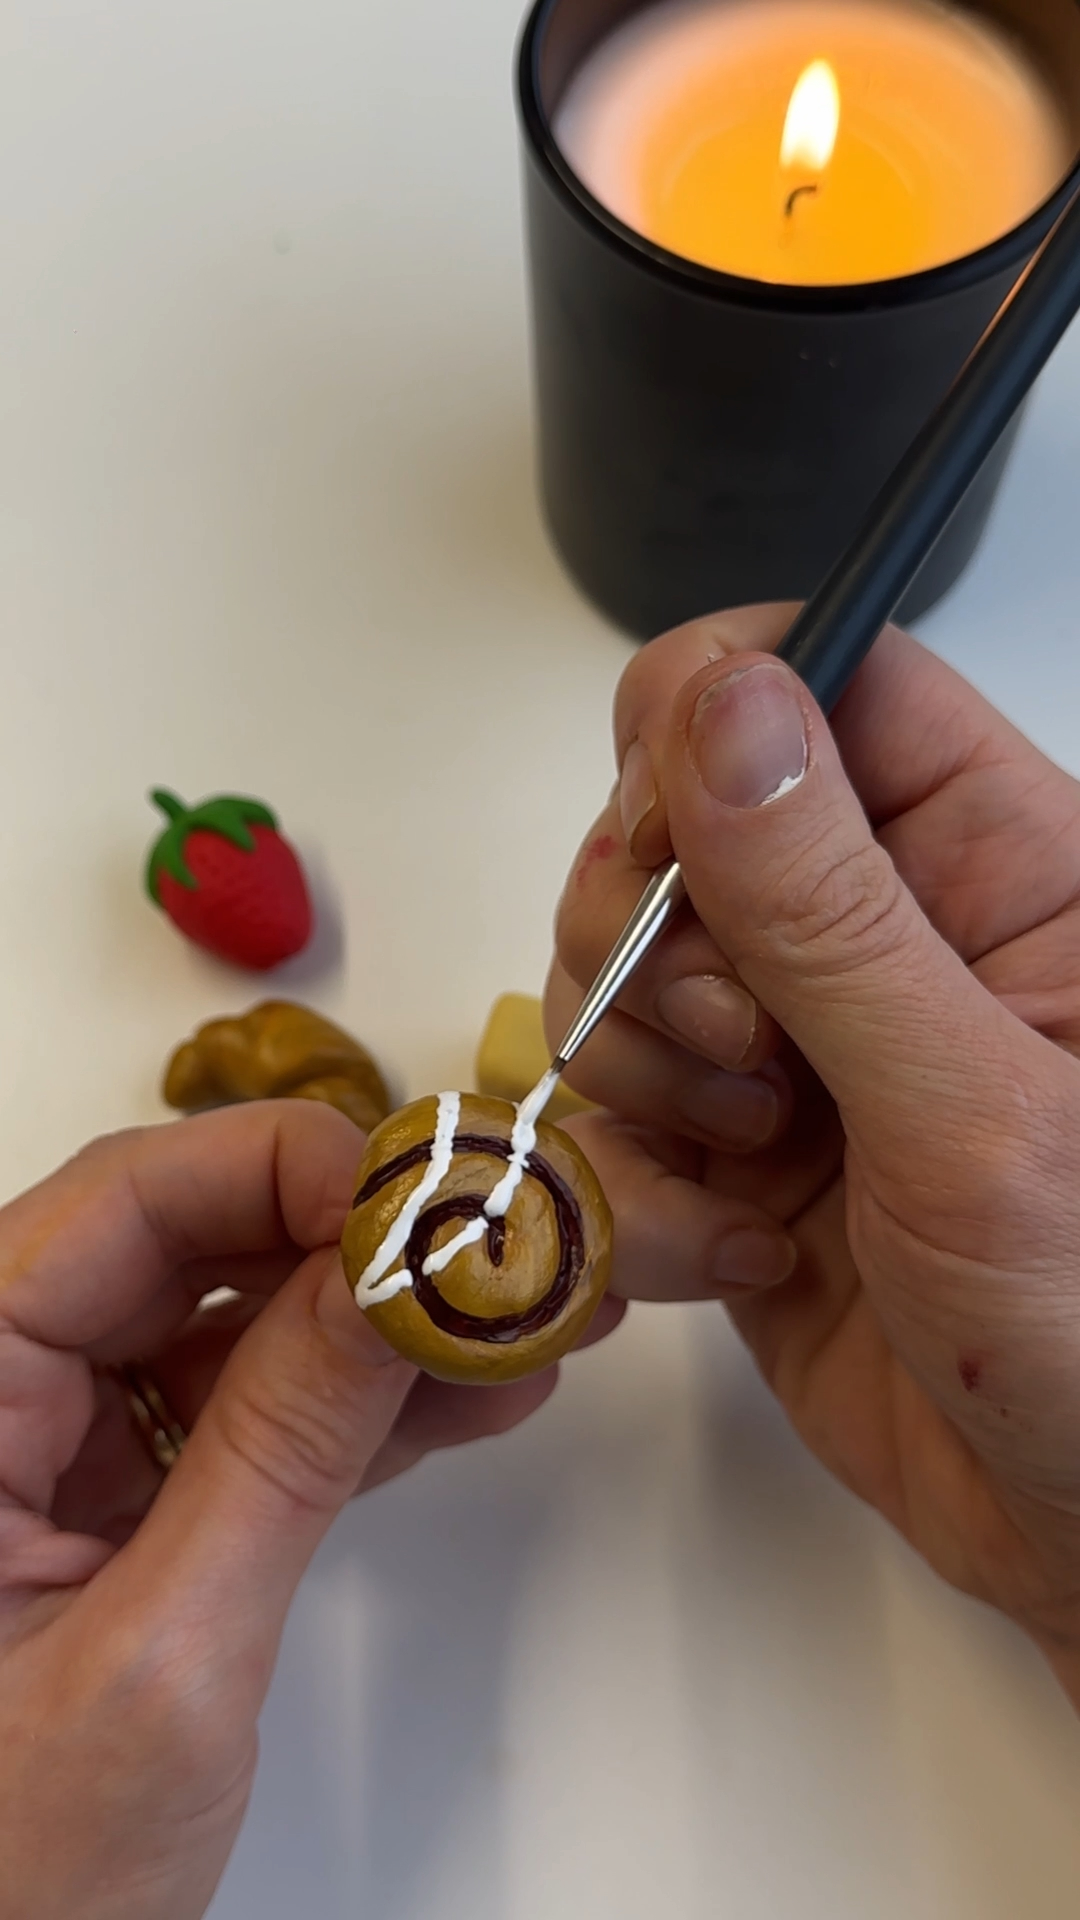
step 4: paint and bring them to life
use paint to add colour, shading, and definition to your pieces.
this is where everything really comes together. adding darker tones or highlights makes a big difference.
tip: build colour slowly in layers rather than applying thick paint all at once.
step 5: attach clips and seal
glue your paper clips into the back of each piece using super glue.
once secure, coat each bookmark in a layer of UV resin and cure it under a UV light for a glossy, durable finish.


the verdict 👩⚖️
what surprised me most was how sturdy these felt once everything was finished. the combination of baked clay and that resin coating makes them really durable, not just decorative.
the fiddliest part was definitely the detailing. especially the croissant layers, which needed a light touch to avoid squishing the shape. but once painted and glazed, everything came together in such a satisfying way.
i’d probably experiment with even more designs next time. maybe a whole bakery set.
you can, but the finish and durability will be different. Polymer clay holds fine details better
Follow the instructions on your specific clay packaging, as this can vary depending on the brand and thickness.
no, but it does add strength and a glossy finish. without it, your bookmarks will be more matte and slightly less durable.
A strong super glue works well for securing the clips into the clay. Make sure it’s fully set before handling.
• making shapes too thin
• rushing the baking stage
• applying resin before glue is fully set
.jpg)
(1).jpg)
(4).jpg)
(5).jpg)
(7).jpg)
(8).jpg)
(10).jpg)
(13).jpg)
(14).jpg)
(15).jpg)
(21).jpg)
(22).jpg)
(24).jpg)
(25).jpg)
(26).jpg)
more like this
looking for more DIY inspiration? Take a look at some other projects I've done similar to this one.
join my monthly craft club
pop your email in and i'll send you the free air dry clay starter kit - plus a monthly drop of new bits, behind-the-scenes chaos, and ideas to brighten your brain.