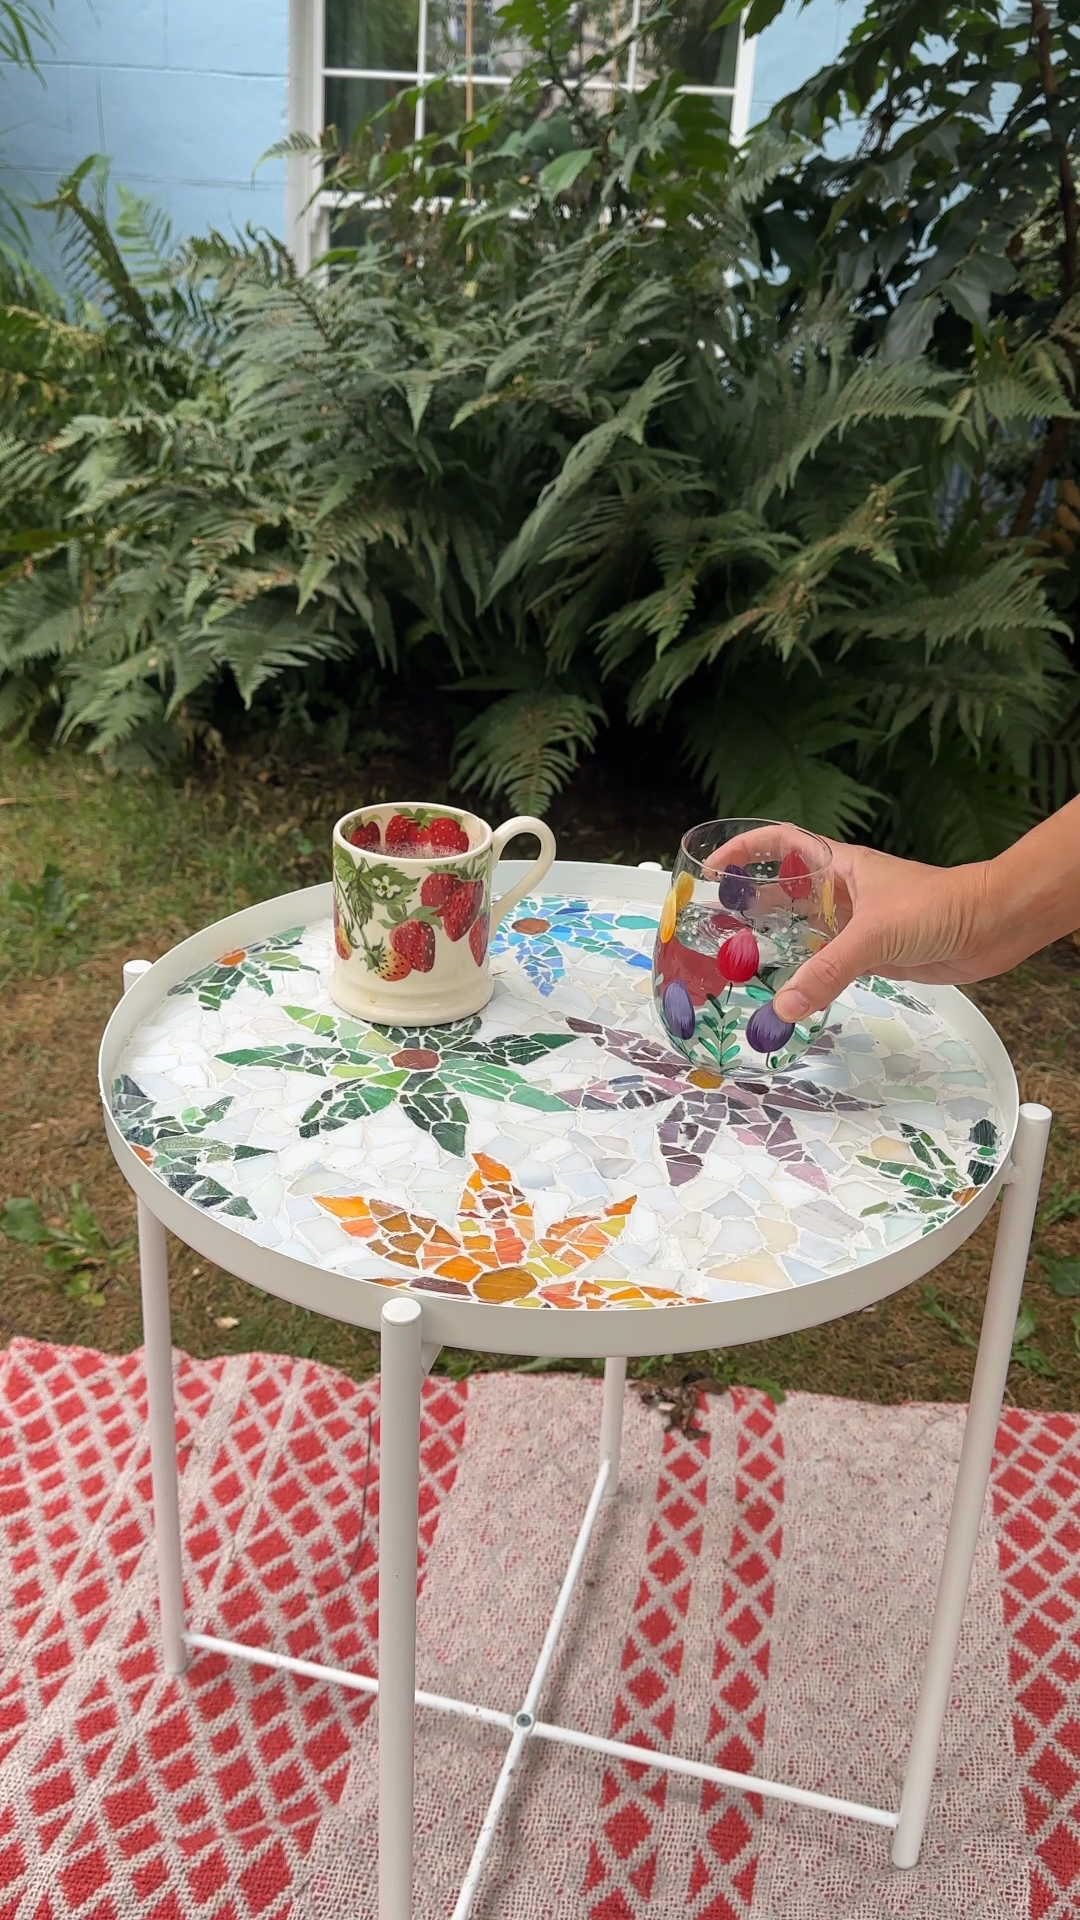
diy mosaic side table (upcycled furniture project) 🌼
a colourful, beginner-friendly way to turn a tired little table into a joyful handmade piece.
🎨 beginner-friendly - surprisingly simple to make
💸 budget-friendly - mine came in under £40
🌈 totally customisable - colours, patterns, shapes… go wild
learn how to make a diy mosaic side table using simple craft supplies and an inexpensive table. this beginner-friendly upcycling project is perfect for adding colour and personality to your home. by cutting and arranging mosaic tiles into a design, you can transform an ordinary table into a completely unique statement piece.
you don’t need loads for this - i picked everything aside from the side table up from hobbycraft.
- a small side table (mine was £15 from Ikea)
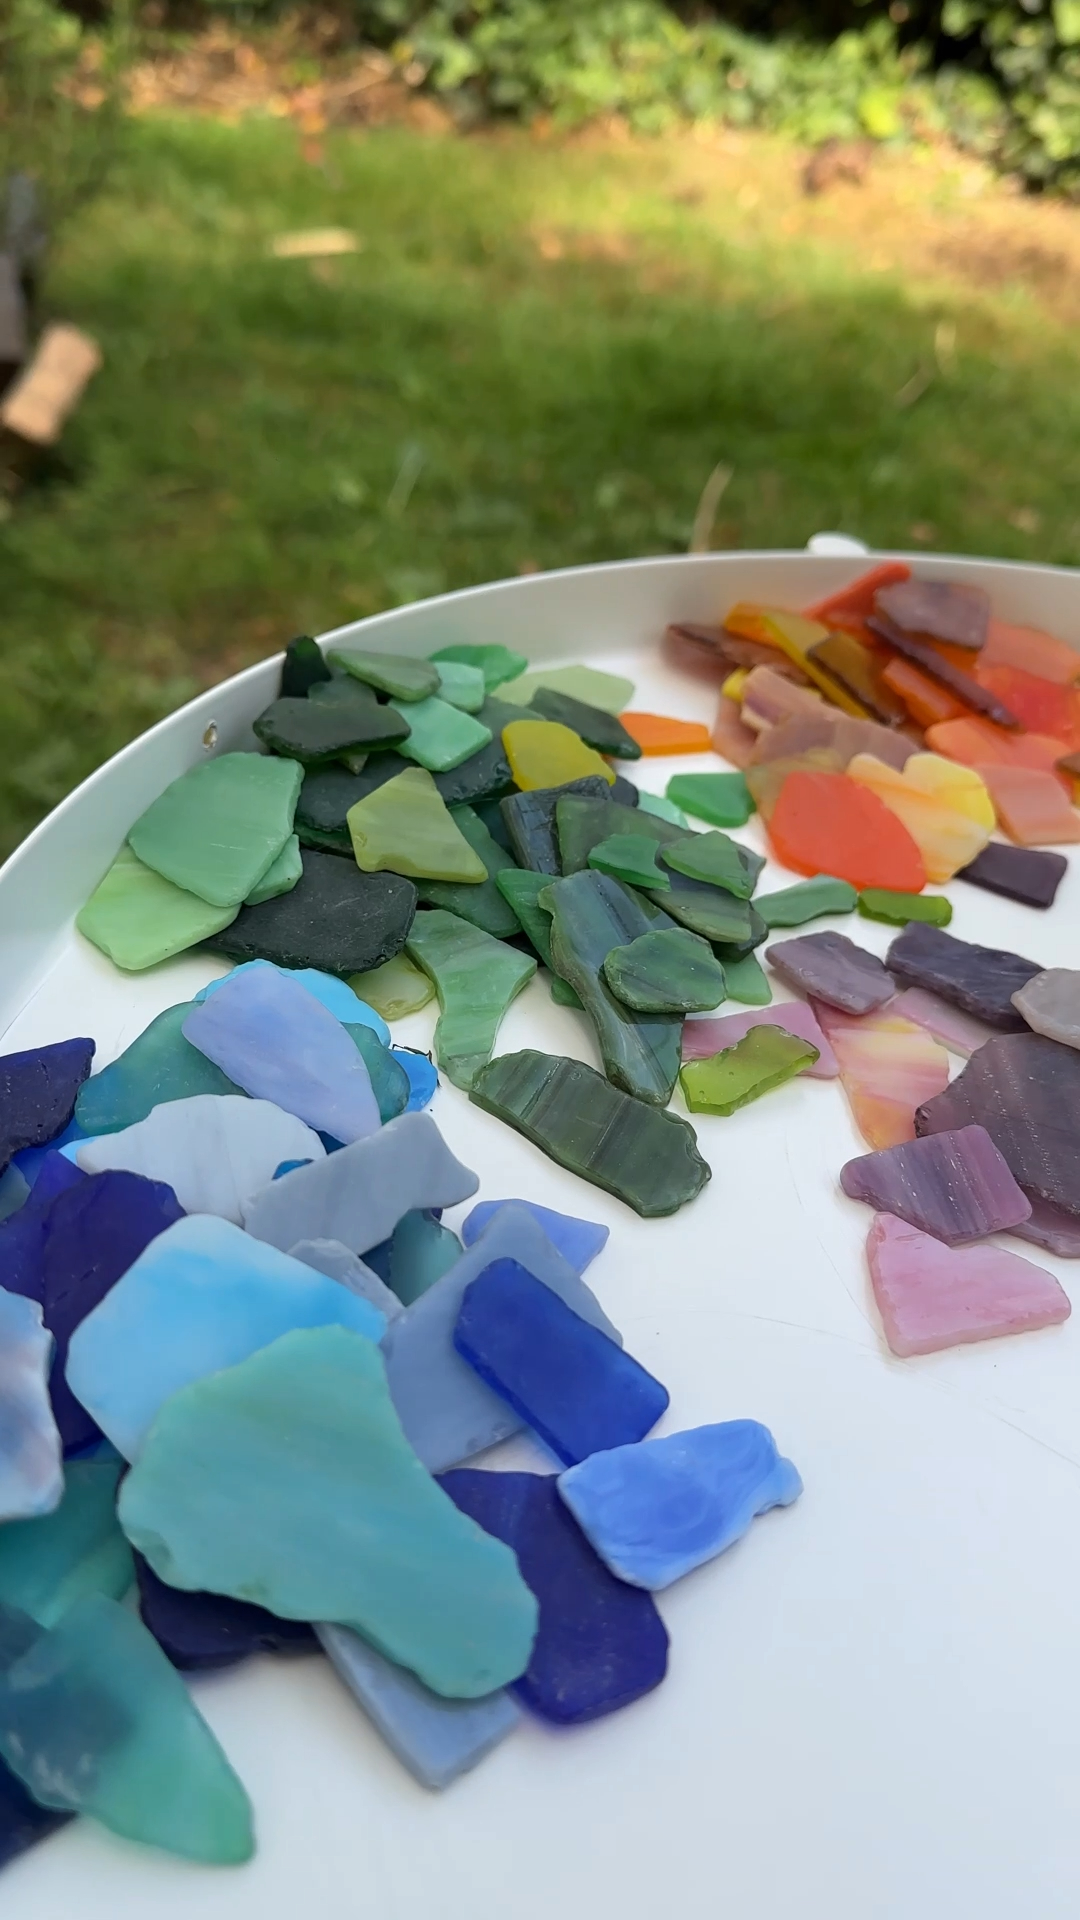
- mosaic tiles (mixed boxes are great for variety)
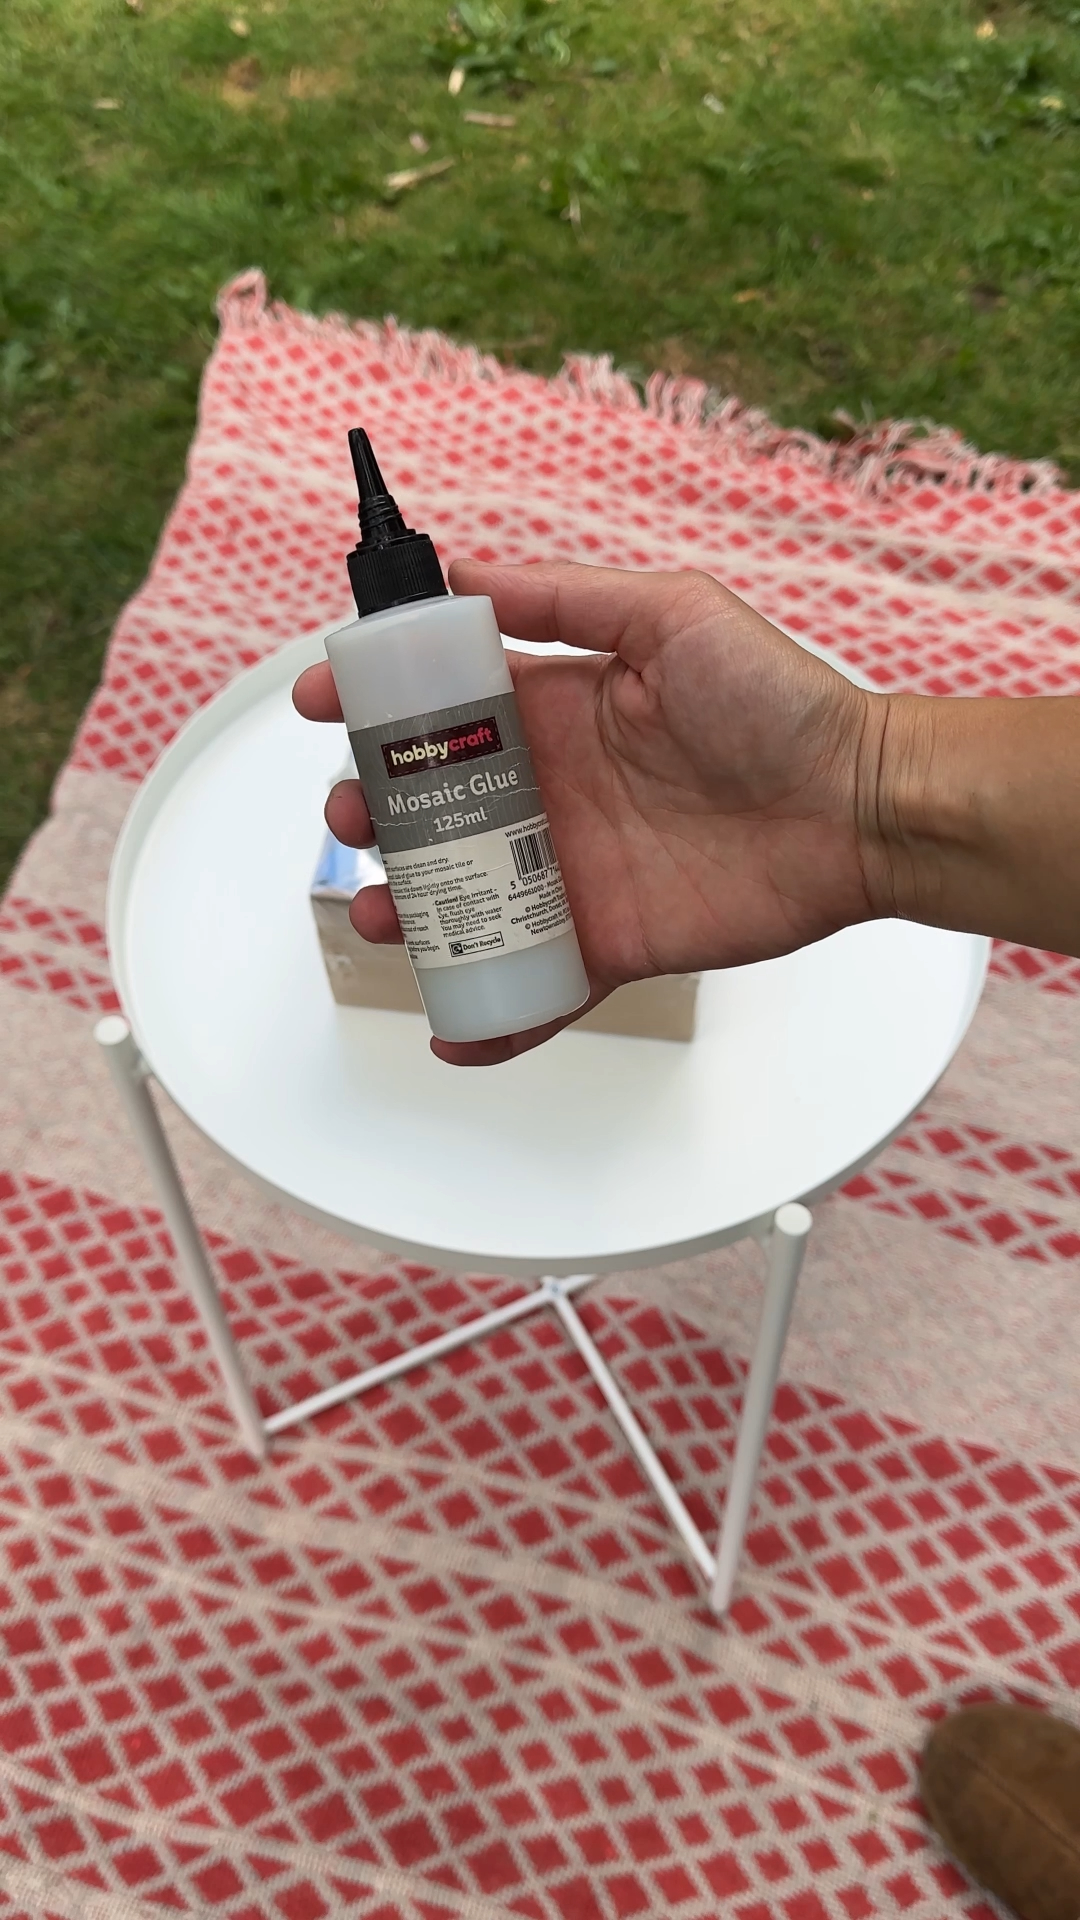
- strong craft glue or tile adhesive
- tile clippers
- grout and grout spreader
- black fineliner pen
- protective eyewear
tip: mosaic is very forgiving. if something doesn’t fit perfectly, that’s part of the charm. grout hides a lot, so don’t overthink it.

Welcome to my online studio of arts, crafts, and everything in between! I post regular DIY crafts here as well as on my social channels to help give everyone of every skill-level the opportunity to create beautiful, handmade gifts and decorations. If you want regular projects delivered to your inbox, use the form below, or follow me on socials!
the idea 💭
if you’ve ever looked at a slightly sad little side table and thought you could be something special, this one’s for you.
this project is all about slowing down, getting a bit messy, and enjoying the process. i picked up this table form Ikea for £15, grabbed some mosaic tiles, and spent a really lovely afternoon turning it into something colourful and completely unique.
there’s no right or wrong with this - you can go floral like i did, totally abstract, super colourful or very minimal. every single table will end up different, which is honestly my favourite part.
if you’ve got an old piece of furniture hanging around that needs a new lease of life, this is such a satisfying way to give it one.
step 1: sketch your mosaic design
start by sketching your design directly onto the tabletop with a black fineliner. this gives you a guide to follow when placing your tiles.
this stage is really just planning and playing with ideas.
i went for a simple floral pattern because i liked the balance and symmetry, but you can absolutely go abstract or freeform if that feels more you. think about where you want your main colours to sit and how you’ll spread them across the table.
tip: mixing glossy and matte tiles adds loads of lovely texture.

step 2: cut and arrange your tiles
use tile clippers to cut your mosaic tiles into the shapes you need.
I started with the centres of the flowers and then worked outward, cutting smaller pieces to form the petals. mosaic tiles break in slightly unpredictable ways, which actually adds a lot of charm.
take your time here and shape pieces until they sit nicely inside your drawn outlines.
⚠️ always wear eye protection and cup your hand around the tile while cutting to stop pieces flying away.

step 3: glue the mosaic into place
once you’re happy with the layout, begin gluing the tiles down.
work in small sections so the glue doesn’t dry before you place your pieces. press each tile gently into position and keep following your drawn design.
after completing the flowers, use larger tile pieces to fill in the surrounding background.
tip: stepping back occasionally helps you spot gaps or areas that need adjusting.

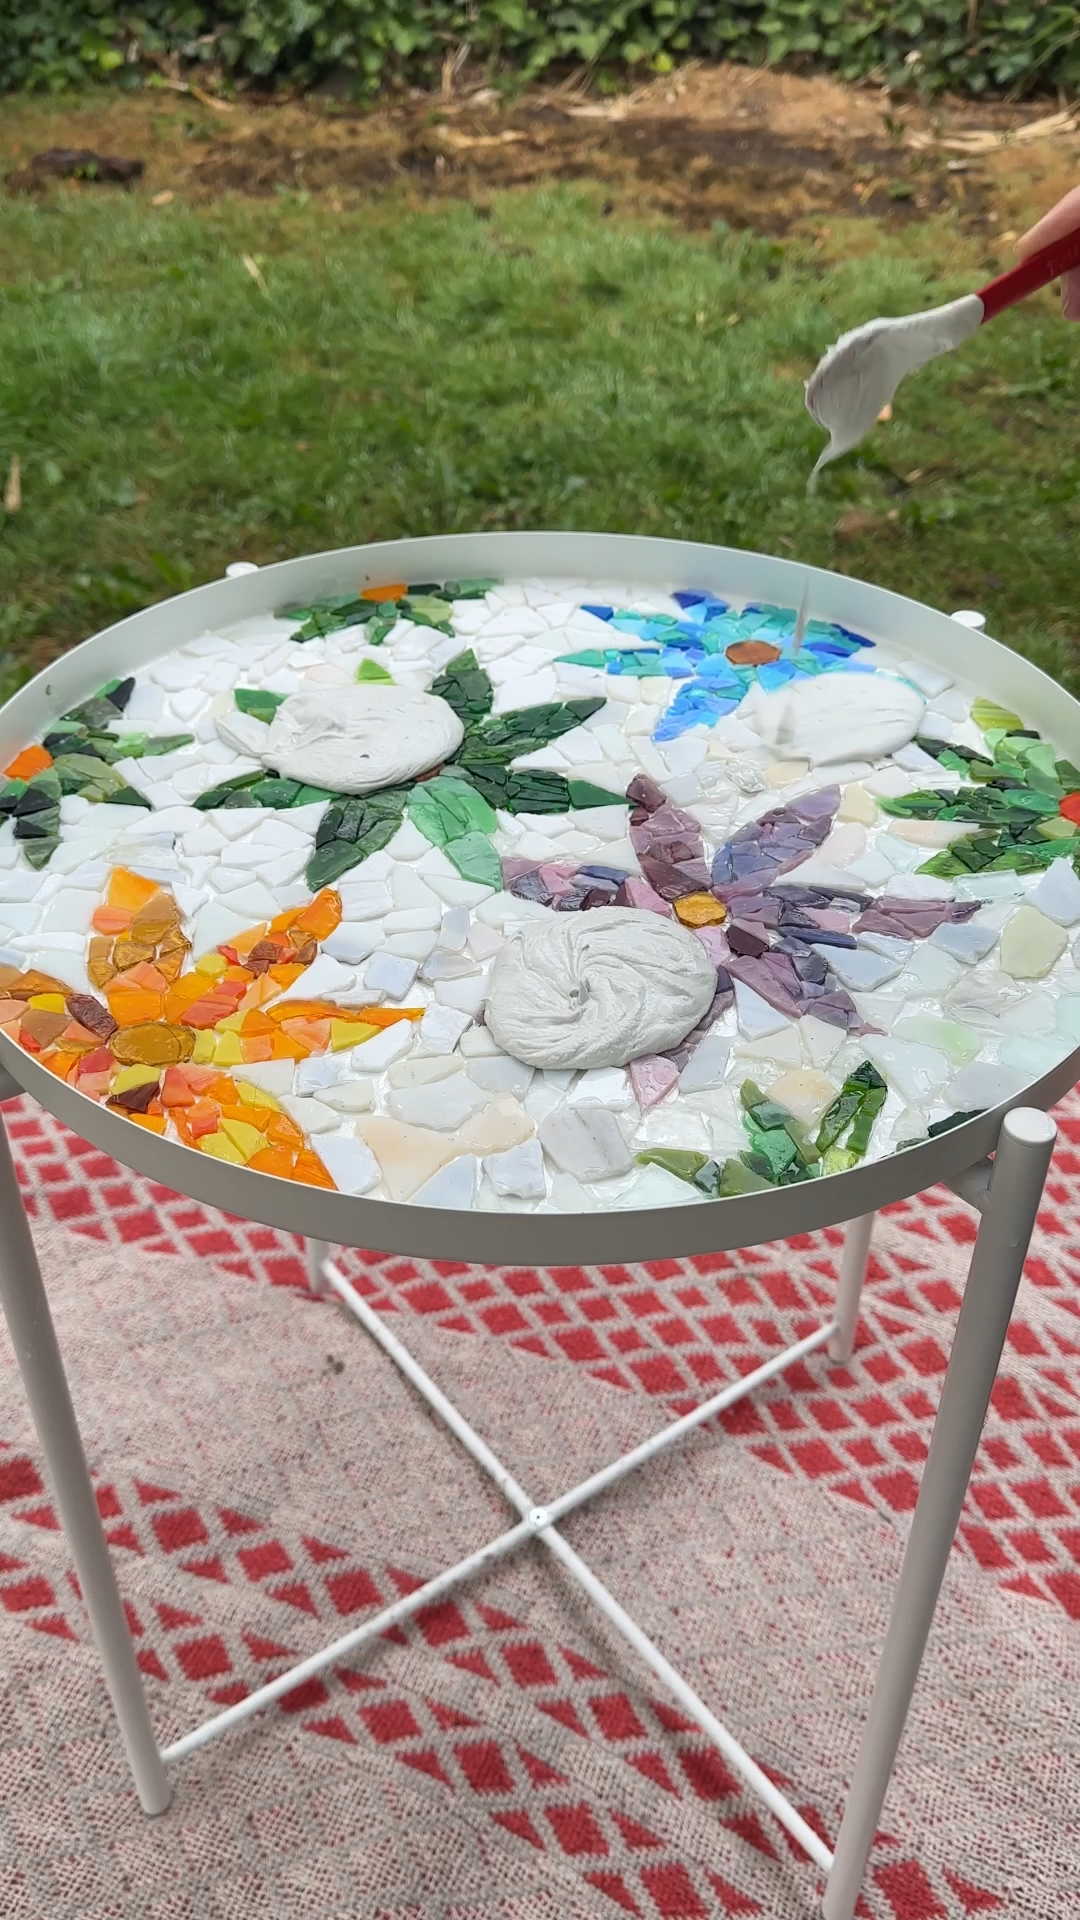
step 4: let the tiles set and apply grout
leave the table overnight so the glue can fully set.
next, mix your grout until it reaches a peanut-butter-like consistency. spread it across the entire surface using a grout spreader, pushing it into all the gaps between the tiles.
once the gaps are filled, wipe away the excess grout to reveal the mosaic pattern underneath.

the verdict 👩⚖️
this was one of those projects where the final step makes all the difference. When the grout goes on, the whole design suddenly pulls together and the mosaic looks amazing.
I was so happy with how the white background made the flowers pop. the slightly irregular tile shapes actually add loads of charm and texture too. if I made another one, I’d probably experiment with a more abstract pattern just to see how different it could look.
but honestly, for a £15 table and an afternoon of crafting, the transformation was amazing!!!
yes, absolutely. mosaic is actually a very beginner-friendly craft because it doesn’t require perfect precision. small gaps and uneven edges become part of the finished texture once the grout is applied.
mine came from Hobbycraft, but any strong craft glue or tile adhesive designed for mosaics should work. the important thing is that it holds the tiles securely to the tabletop surface.
in this project the tiles were left overnight so the glue could fully set before applying grout.
not at all. you can create floral designs like this one, geometric patterns, or completely abstract layouts. every mosaic ends up looking different, which is part of the fun.
yes. the same process works for trays, plant stands, picture frames, and even larger furniture pieces as long as the surface is stable
• cutting tiles without eye protection
• rushing the drying time before grouting
• leaving gaps that grout can’t properly fill


more like this
looking for more DIY inspiration? Take a look at some other projects I've done similar to this one.
join my monthly craft club
a monthly drop of new bits, behind-the-scenes chaos, and ideas to brighten your brain. pop your email in and i’ll send you something nice