diy clay sweet dispenser 🍬✨
a playful ceramic project that actually works (!!!)
🍬 playful but functional — it’s not just cute, it works
🎨 completely customisable — colours, swirls, themes
🌀 satisfying build process — shaping, blending, problem-solving
learn how to make a working clay sweet dispenser using simple slab-building techniques. this playful ceramic project blends sculpture with functionality, guiding sweets through an internal slide so they roll out the front. it’s a fun build for ceramic lovers who want to experiment with functional pottery.
- stoneware clay or earthenware clay
- rolling pin
- needle tool or craft knife
- metal ruler (for clean edges)
- slip (for attaching and joining clay pieces)
- sponge + water for smoothing
- small circular cutter (for the sweet opening)
- kiln access for bisque and glaze firing
- ceramic glazes (pastels are very fun here)
- sweets for testing (very important)
tip: test the internal slide with a marble or small round object before firing. if it rolls smoothly, your sweets should too.

Welcome to my online studio of arts, crafts, and everything in between! I post regular DIY crafts here as well as on my social channels to help give everyone of every skill-level the opportunity to create beautiful, handmade gifts and decorations. If you want regular projects delivered to your inbox, use the form below, or follow me on socials!
the idea 💭
three years ago i made a sweet dispenser using a bottle and an ice cream tub… and my insta and tiktok followers LOVED it 💕
since then, i’ve practiced and practiced - experimenting with different crafts, materials, and processes. and more recently, i’ve completely fallen in love with ceramics.
so naturally my brain started wondering:
“okay… maybe i could try and make the sweet dispenser in clay…’
i won’t pretend it felt simple. there are so many ways it could fail. cracking while drying, warping in the kiln, sweets jamming instead of rolling out the front etc etc… but after spending time learning how clay behaves, i felt confident enough to give it a go.
this version is sculptural, pastel and slightly nostalgic (hello campino vibes). but importantly, it actually works!!! 🍬
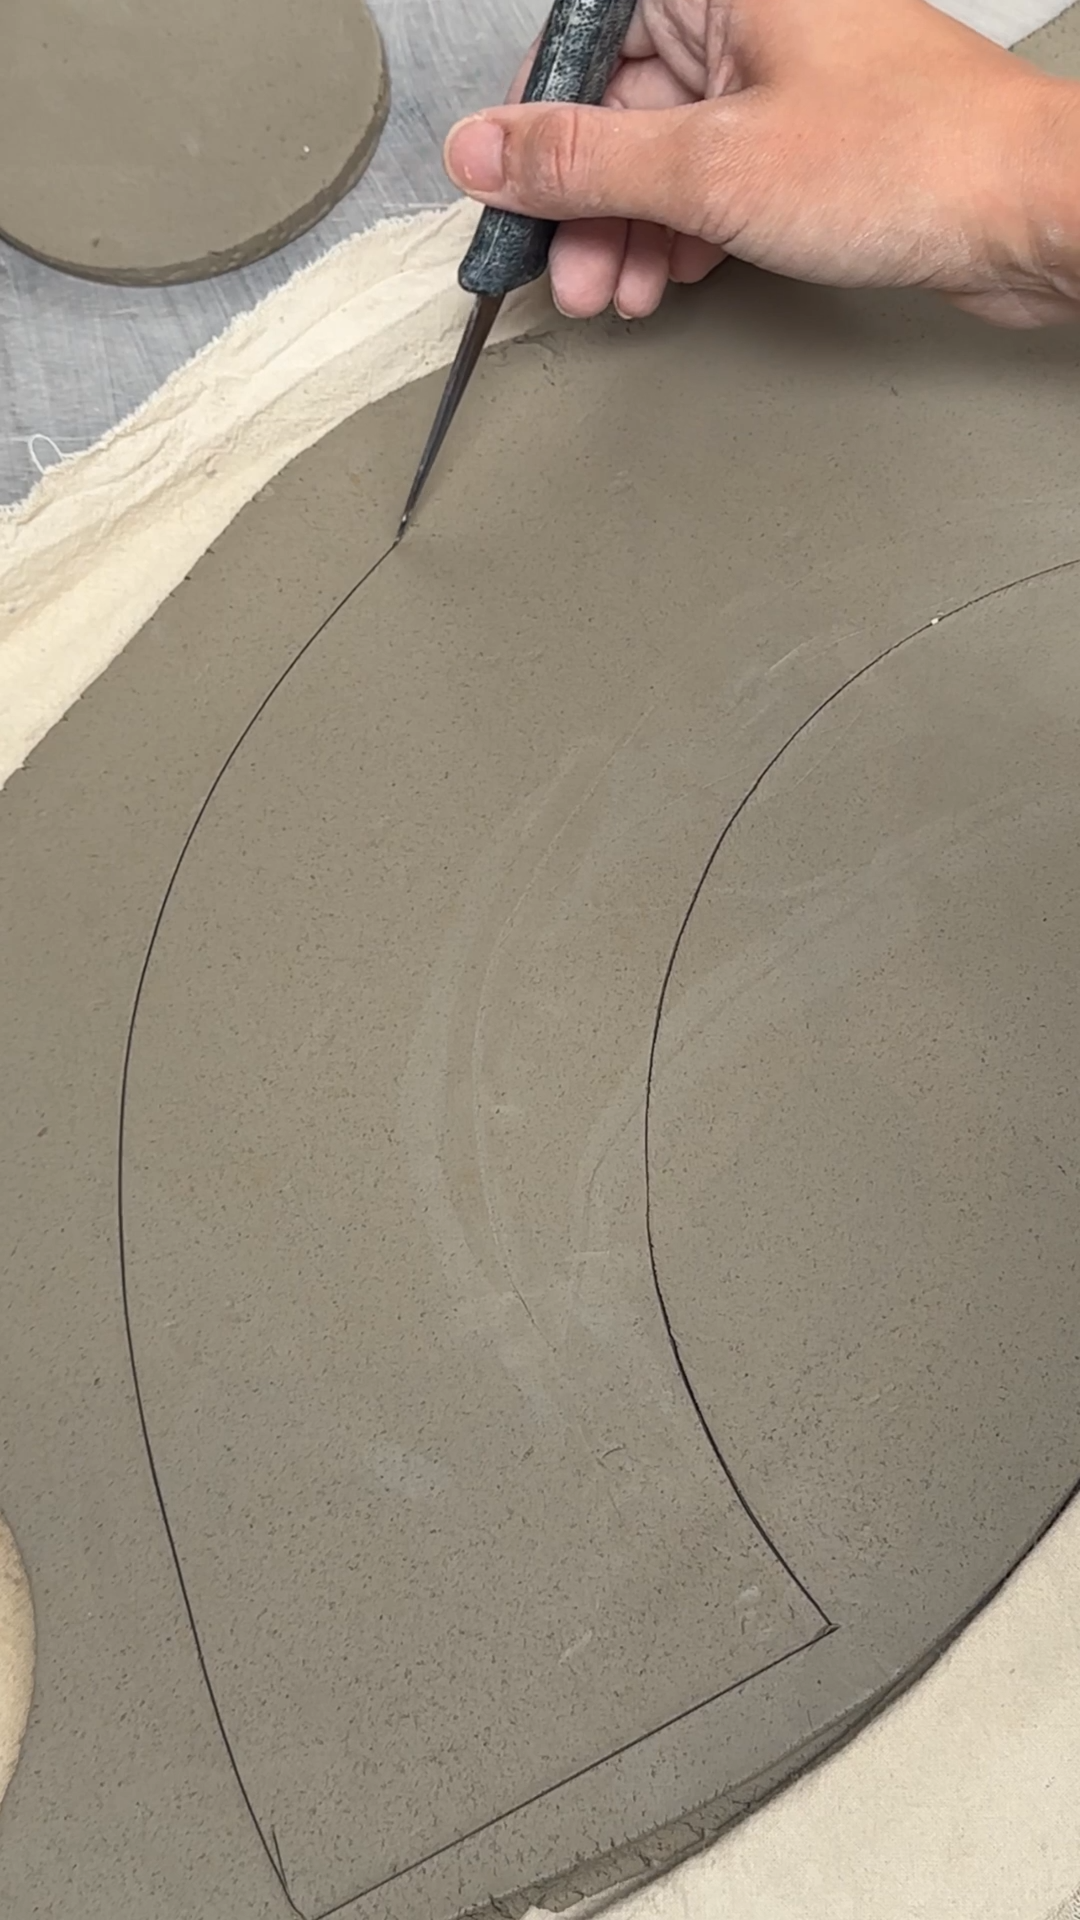
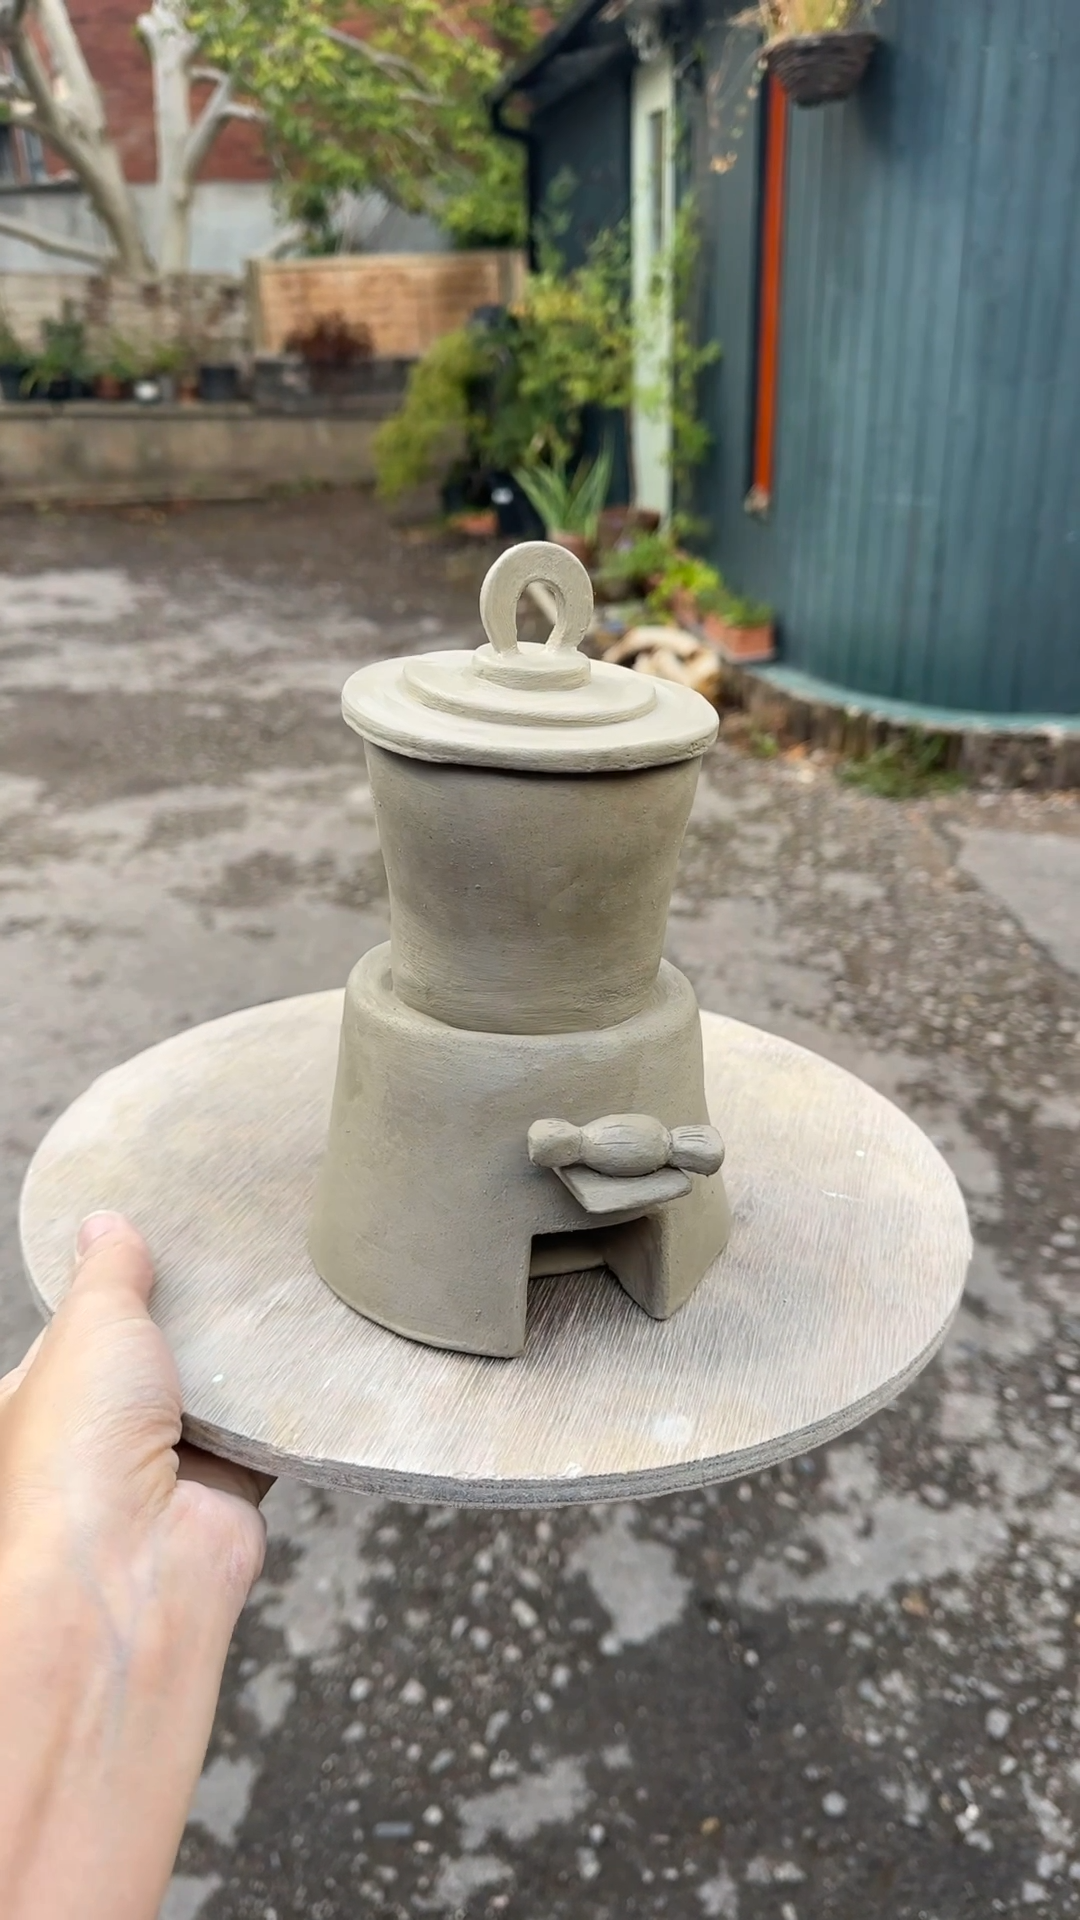
step 1: roll and cut the base 🌀
roll out a slab of clay — thick enough to hold structure, but not chunky. we want sturdy, not heavy (around 8–10mm works well).
use a circular cutter (i used something biscuit-sized) to cut the base.
then, semi free-hand a curved rainbow shape that will wrap around to form the body of the dispenser.
it won’t look like much yet. trust the process.
⚠️ Keep walls even throughout. Uneven thickness cracks during firing.
step 2: attach the body walls🍦
score and apply slip to attach the curved wall to the circular base.
press the clay gently into place and blend the seams together using your fingers and a damp sponge until the joins feel smooth and secure.
once attached, cut a small circular hole in the top of the body where sweets will drop through later.
watch out: weak joins at this stage can split during firing, so take time blending them properly.

step 3: build the funnel section 🔄
roll another slab of clay and repeat the shaping process at a slightly smaller scale.
this piece becomes the funnel that sits above the dispenser body and guides sweets downward.
attach and blend the funnel into the structure so the sweets have a clear path from the top opening toward the inside.
tip: think about gravity here. the smoother and more direct the path is, the better the sweets will travel.

step 4: create the internal slide and opening 🍭
inside the dispenser, build a small angled slide that directs sweets toward the front opening.
cut a small rectangular window in the front of the base where the sweets will come out.
then create a small clay slider that can block or release the sweets when needed.
tip: test the angle of the slide using a marble or similar object to make sure it rolls properly.

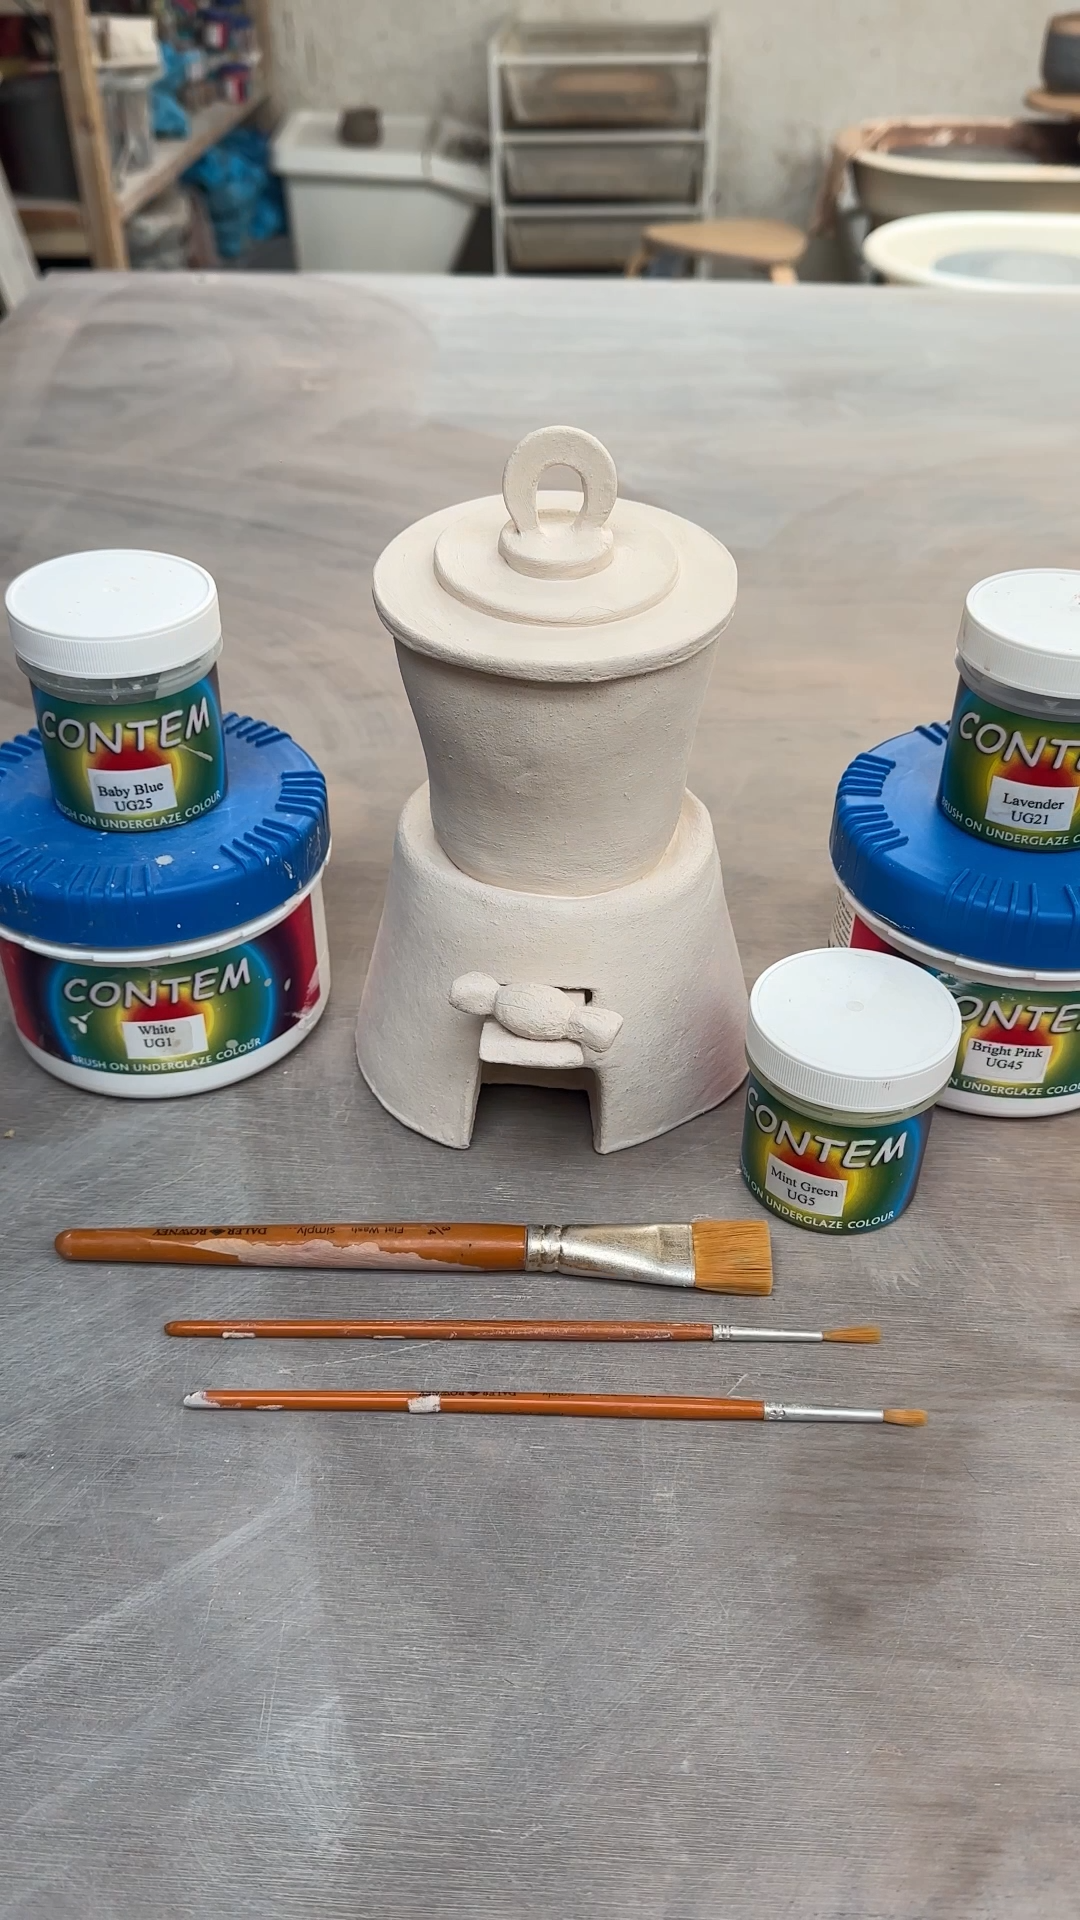
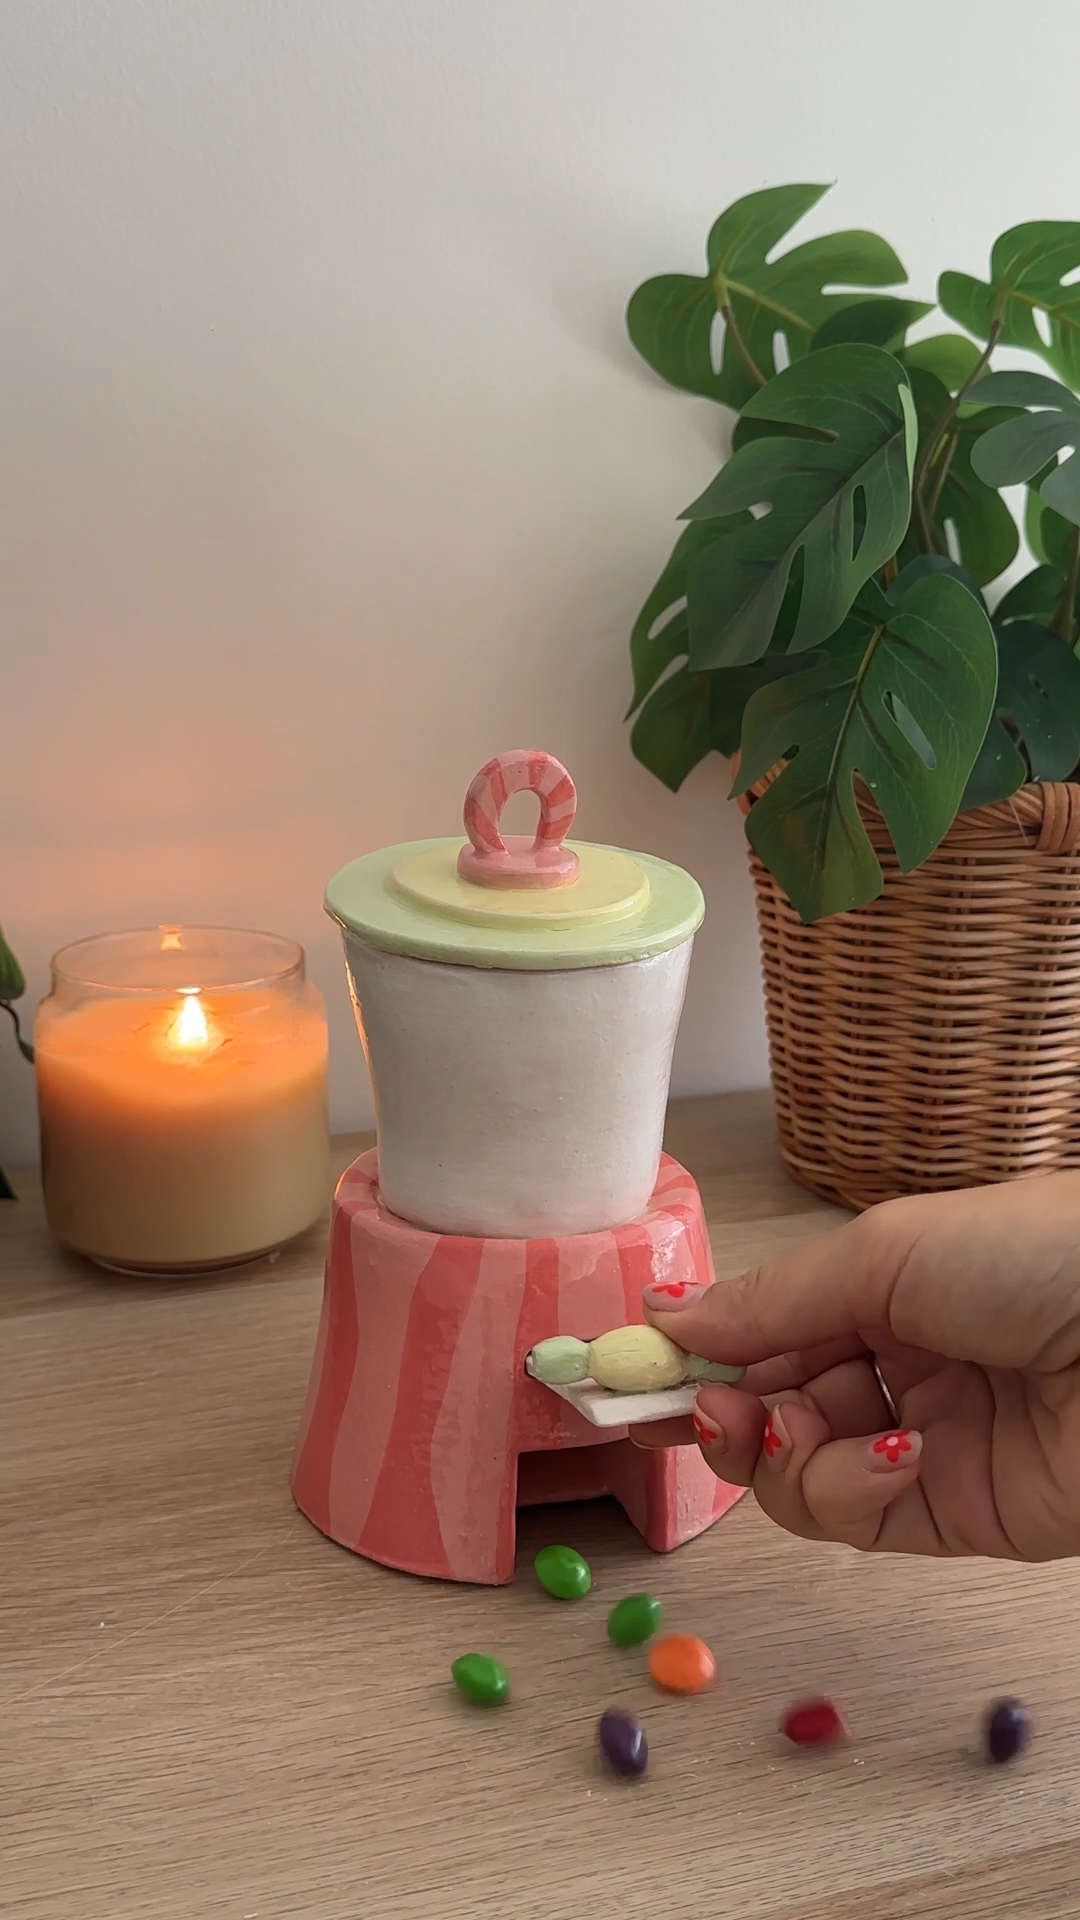
step 5: glaze and fire the dispenser 🎨✨
once the piece is completely dry, it can be bisque fired.
after the first firing, apply your glazes. in this build pastel colours were used with pink swirls inspired by nostalgic sweets.
once the glaze has dried, send the piece for glaze firing and wait for the final result.
watch out: ceramic pieces shrink during firing, so internal clearances need a little tolerance.

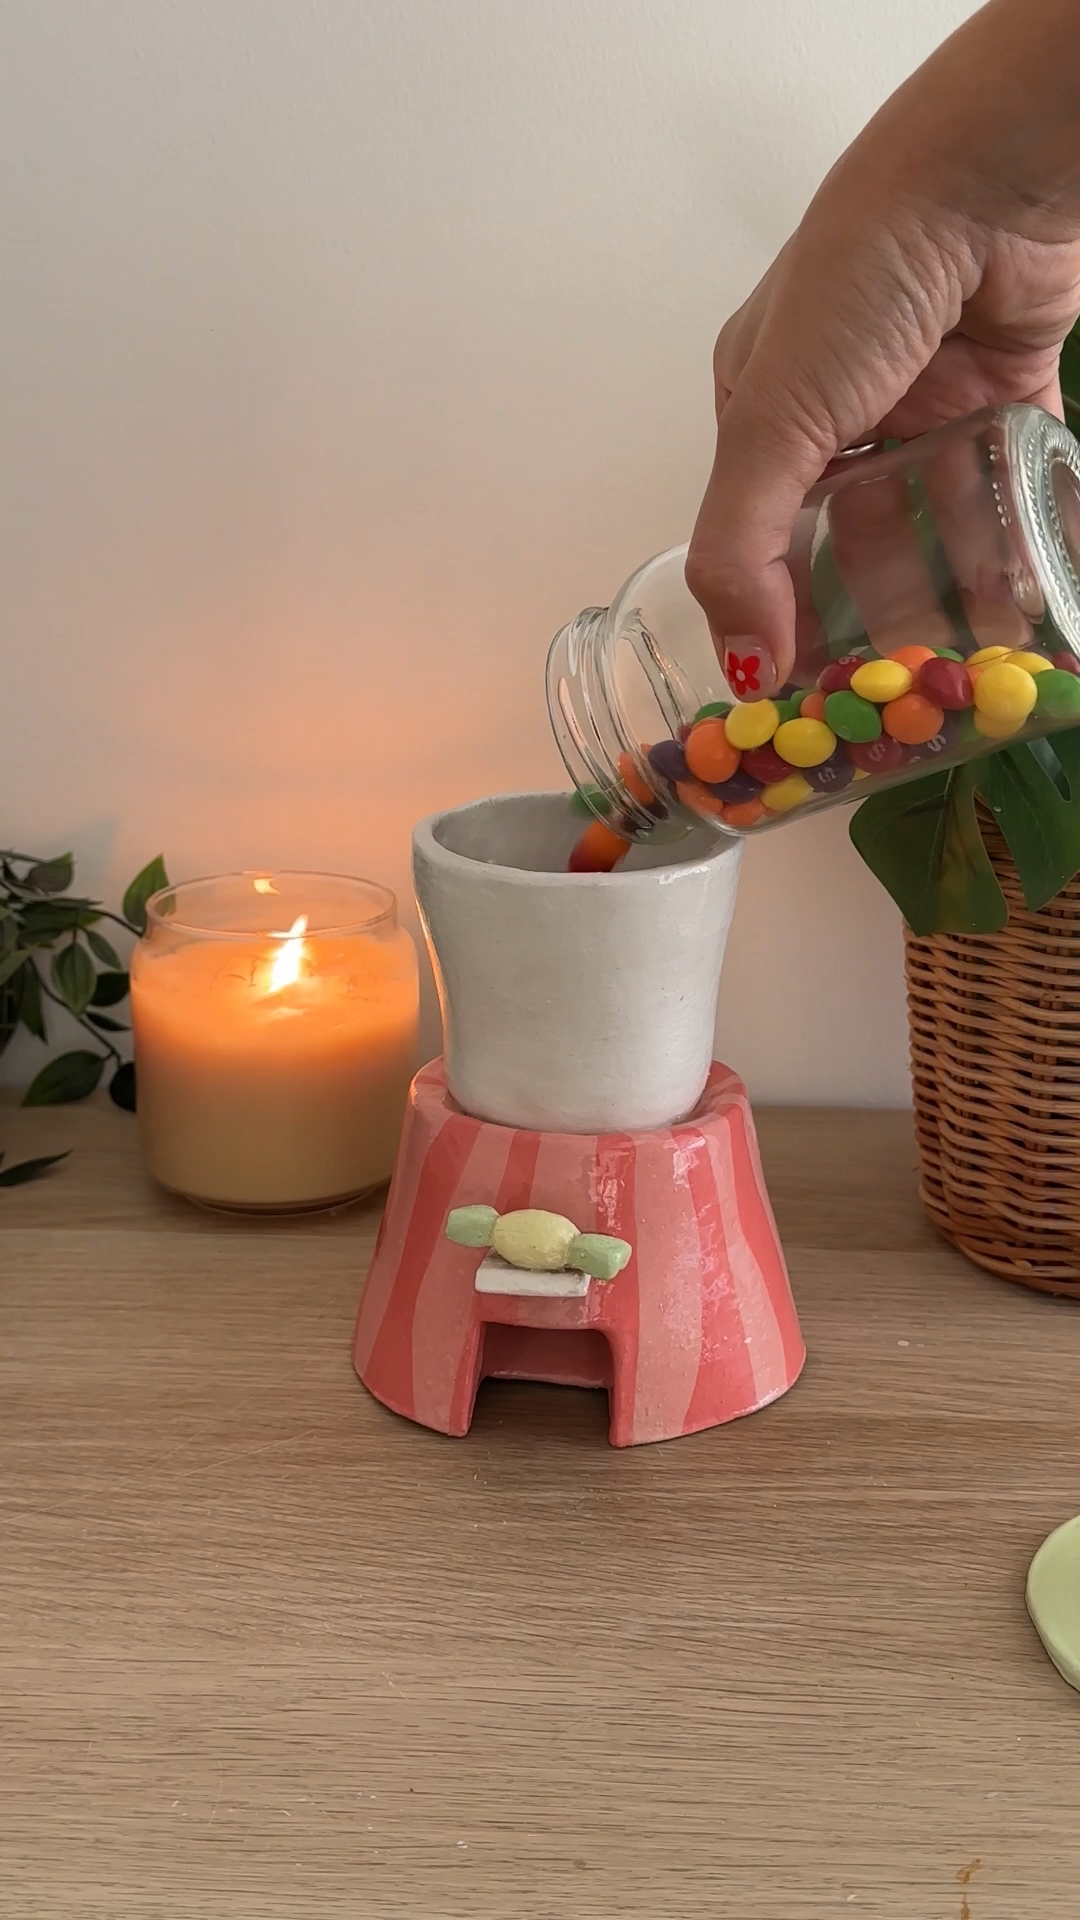
the verdict 👩⚖️
I was so nervous something would warp or shrink weirdly. but… it works. like properly works.
I put skittles inside and they rolled out perfectly (slightly faster than expected, so I might make a little dish for it to sit on). I’m honestly a bit obsessed with it. slightly ridiculous, but in the best way.
drying time depends on the thickness of the clay and the environment it’s drying in. thicker structures like this dispenser often need several days to dry fully. if clay goes into the kiln while still damp, it can crack or even explode during firing.
cracking usually happens when different parts of the clay dry at different speeds. thick joins, uneven walls, or rapid drying can all cause stress in the clay. keeping walls even and letting the piece dry slowly can help prevent this.
yes, if the internal slide is angled correctly. the sweets need enough tilt and a smooth surface to move under their own weight. testing the slide with a marble before firing is a good way to check the flow.
air dry clay may work for decorative versions, but it won’t be as durable as fired ceramic. because this project includes moving sweets inside the structure, fired clay will hold up much better over time... that said, I am thinking of making a version from air dry clay. watch this space.
common mistakes to avoid 🧠
- build the internal slide properly (it makes all the difference)
- don’t rush drying (cracks are not the vibe)
- test with multiple sweet sizes


more like this
looking for more DIY inspiration? Take a look at some other projects I've done similar to this one.
join my monthly craft club
a monthly drop of new bits, behind-the-scenes chaos, and ideas to brighten your brain. pop your email in and i’ll send you something nice