diy air dry clay magnetic fridge notepad 👀📝
a simple air dry clay project that creates a reusable fridge notepad for reminders, lists, and little daily notes.
🧲 practical and decorative for your fridge
🎨 easy to customise with colours or doodles
⚡ simple beginner air dry clay project
✏️ reusable surface for notes and reminders
this diy air dry clay magnetic notepad turns a simple slab of clay into a reusable fridge memo board. It’s an easy beginner project that adds a handmade touch to your kitchen while giving you a practical place to jot down reminders, shopping lists, or quick notes.
• air dry clay
• rolling pin
• craft knife
• pen lid (for the notebook-style indents)
• water for smoothing edges
• white paint
• coloured pencils (for notebook lines)
• UV resin
• UV lamp
• magnetic tape (cut to size)
• glue
tip: roll your clay to around 6 mm thick. thinner slabs can crack more easily when drying.

Welcome to my online studio of arts, crafts, and everything in between! I post regular DIY crafts here as well as on my social channels to help give everyone of every skill-level the opportunity to create beautiful, handmade gifts and decorations. If you want regular projects delivered to your inbox, use the form below, or follow me on socials!
the idea 💭
I love those little paper notes that end up stuck to the fridge. shopping lists, reminders, quick scribbles before leaving the house. they’re practical, but they also make a space feel lived in.
so the idea here was to recreate that familiar notepad look using clay. something that looks like a sheet of paper but is actually reusable and a bit more playful.
the detail I really wanted to get right was the spiral notebook edge. without that, it just looks like a rectangle. so pressing those little indents along the side became the key step.
there was also a moment where I wondered whether the illusion would actually work once it was painted. but once the red and blue lines went on and the resin gave it that glossy finish, it suddenly clicked.
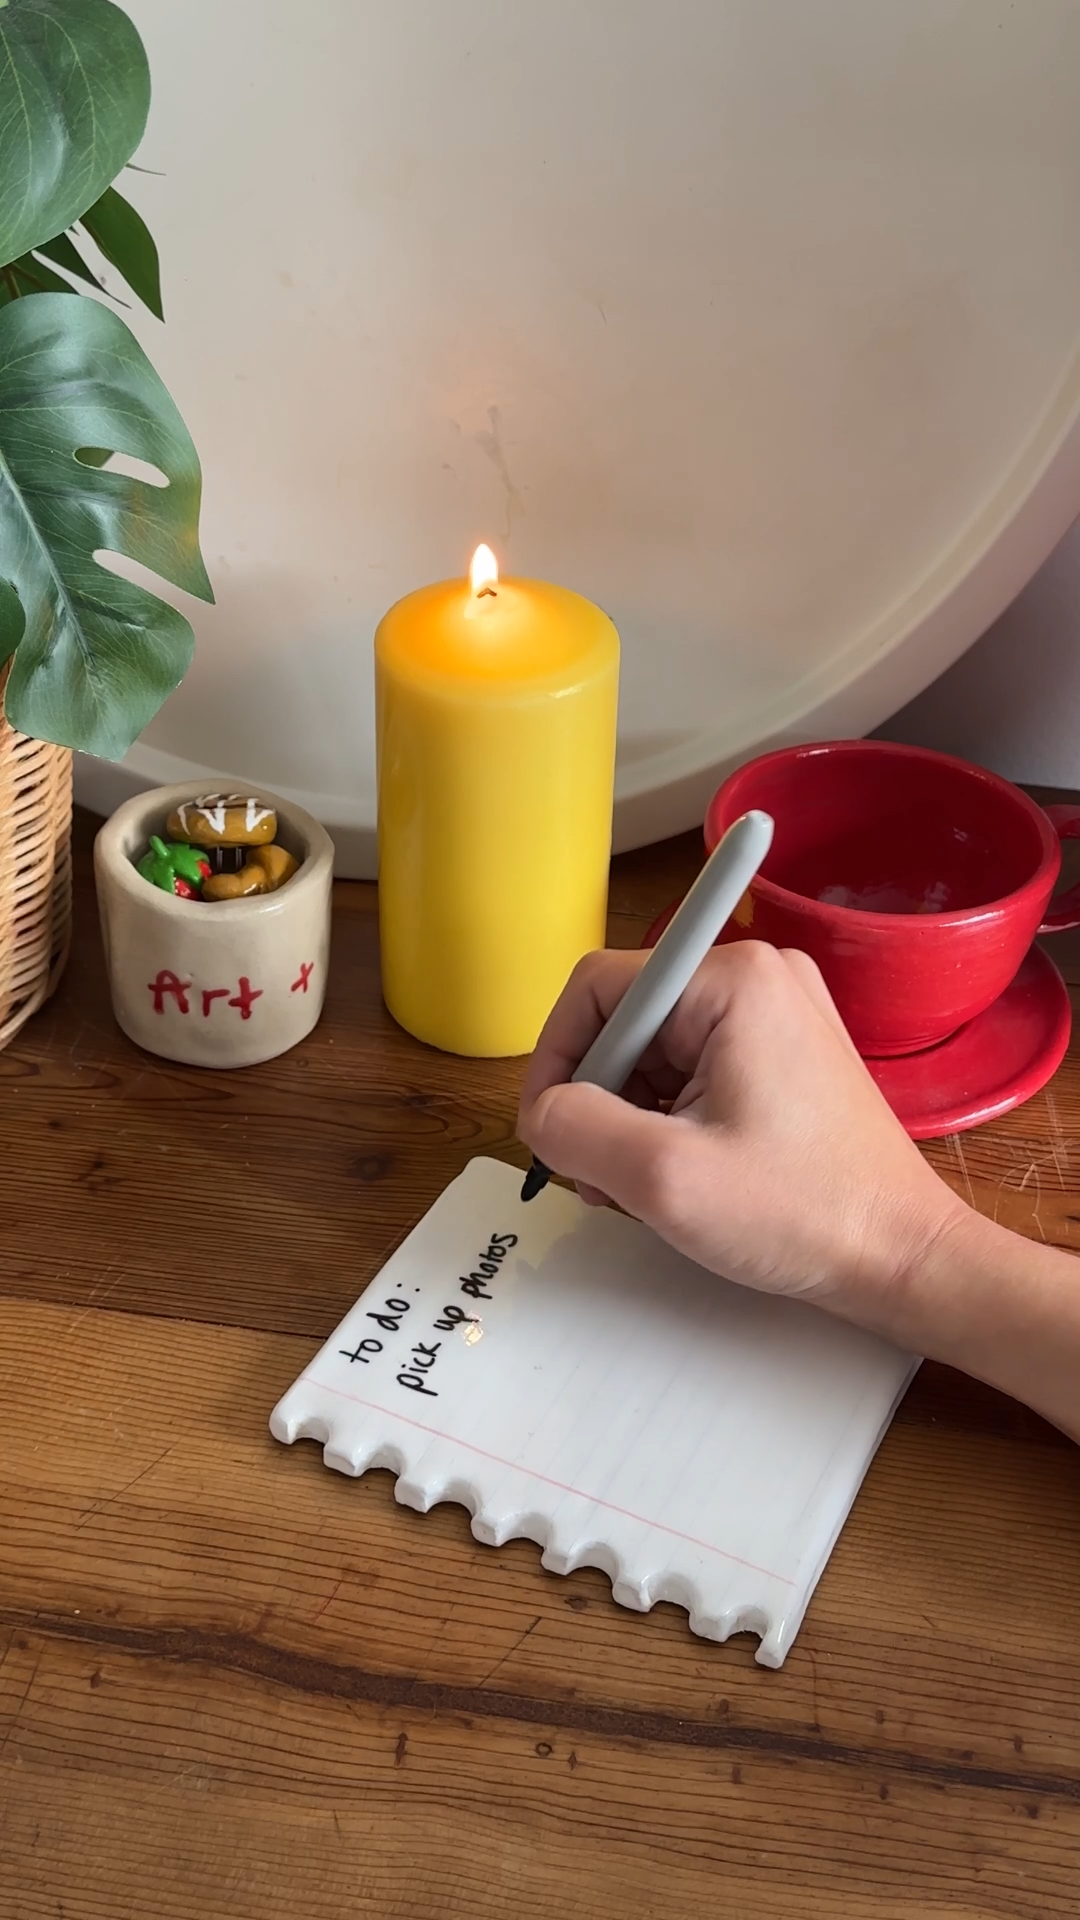
now it’s a little reusable fridge notepad that’s both practical and handmade 🌟
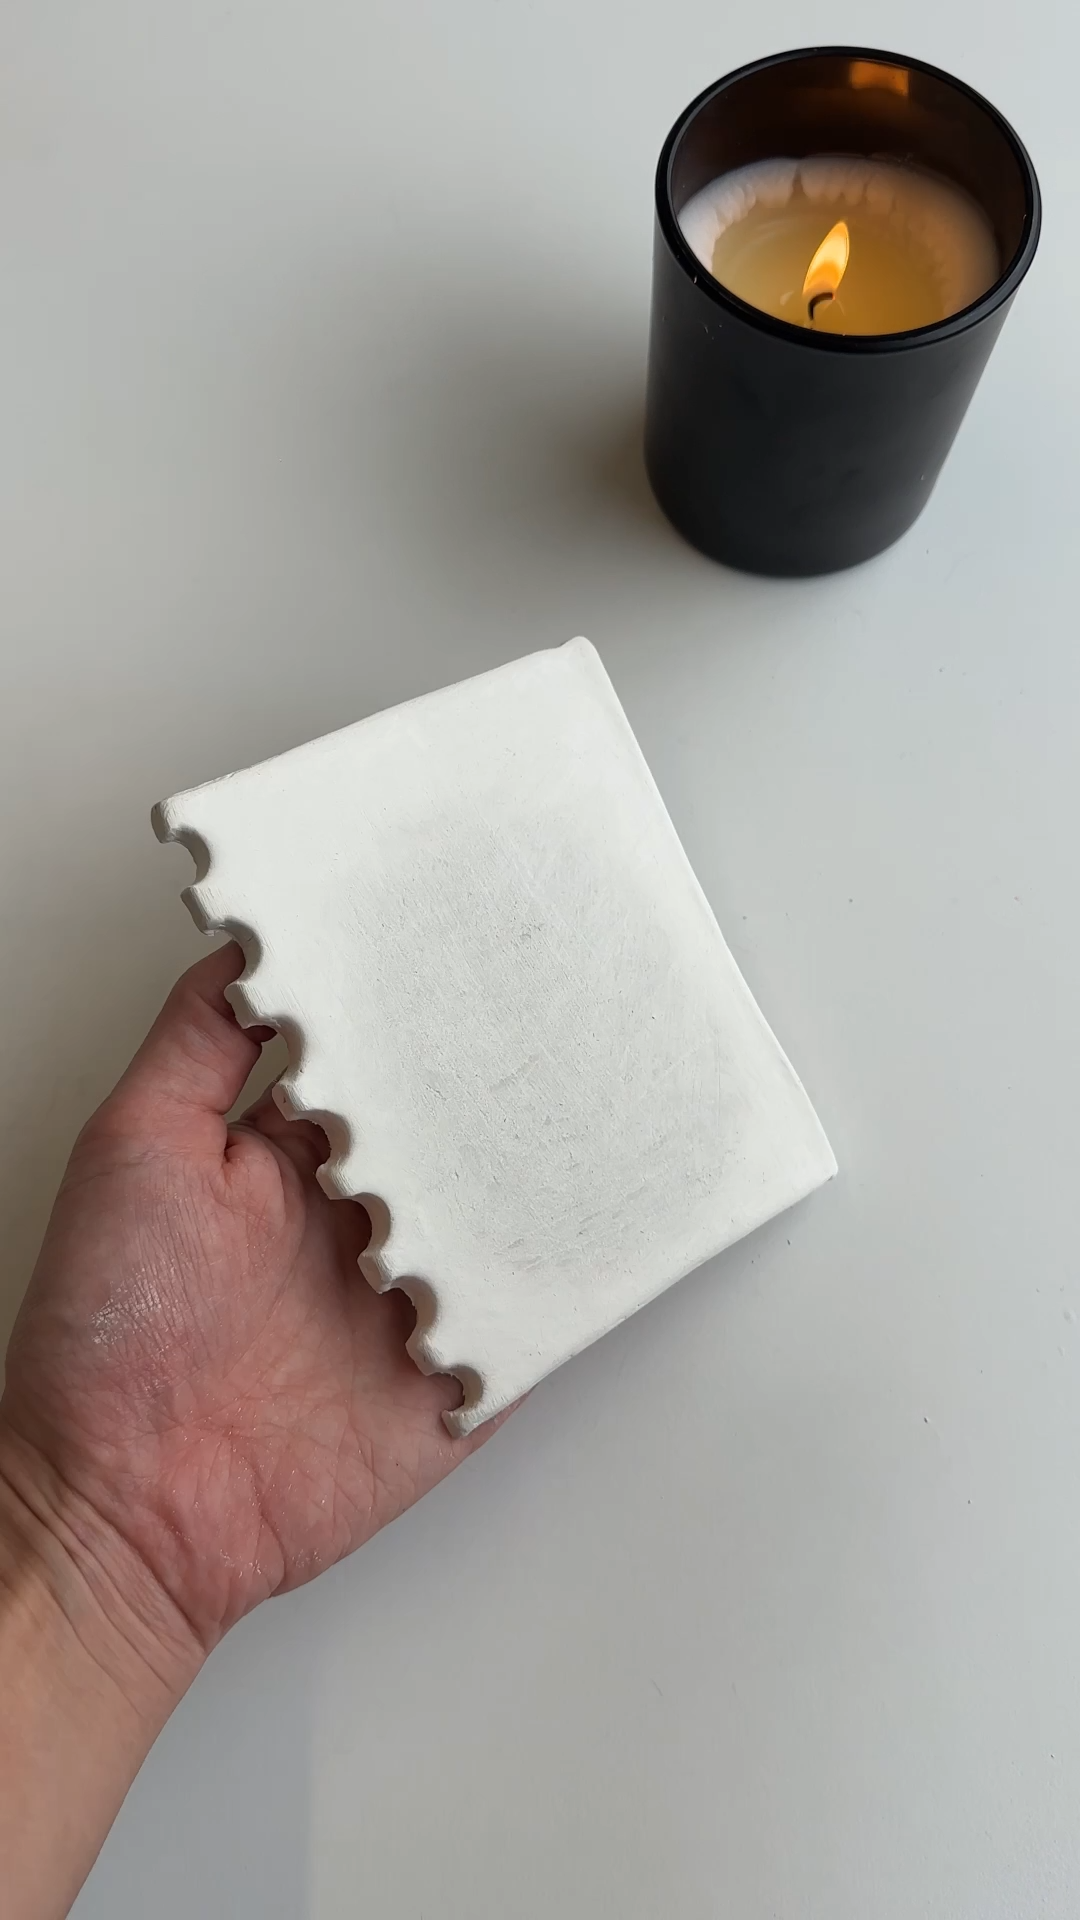
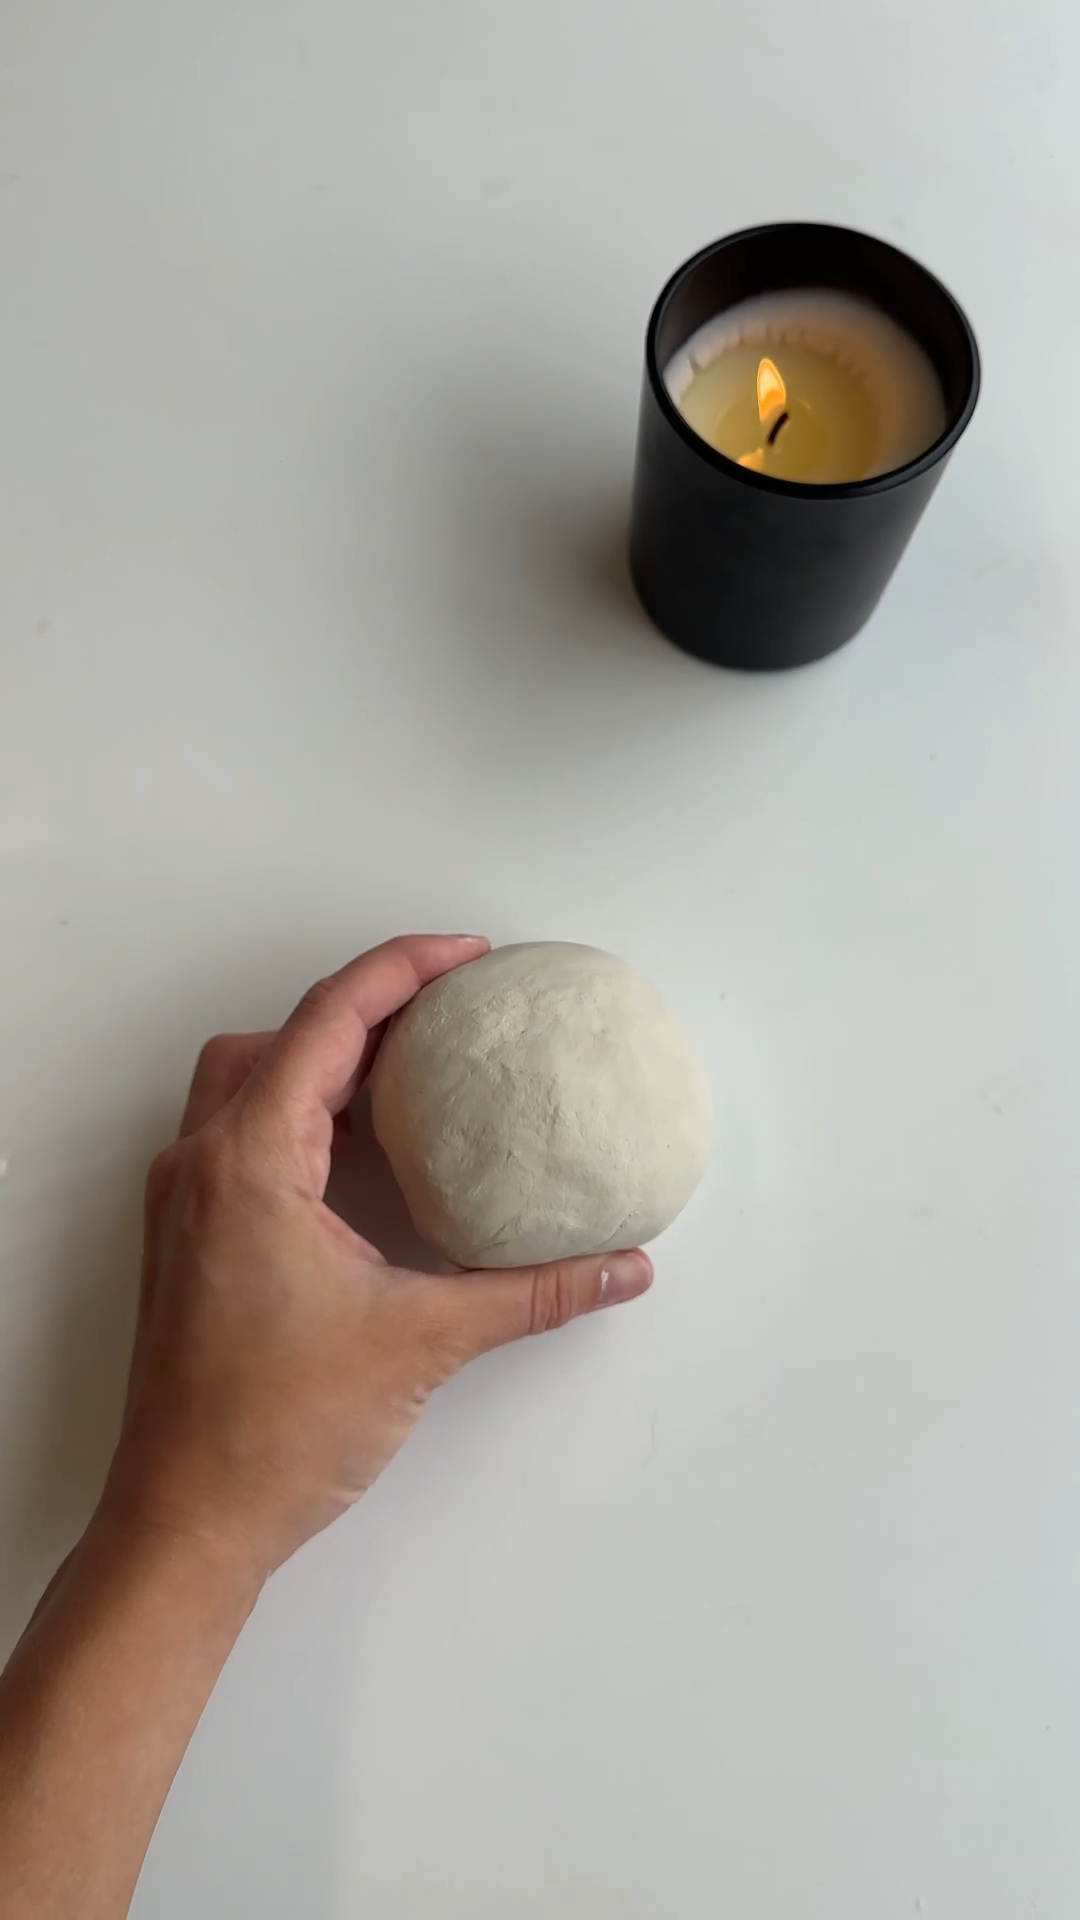
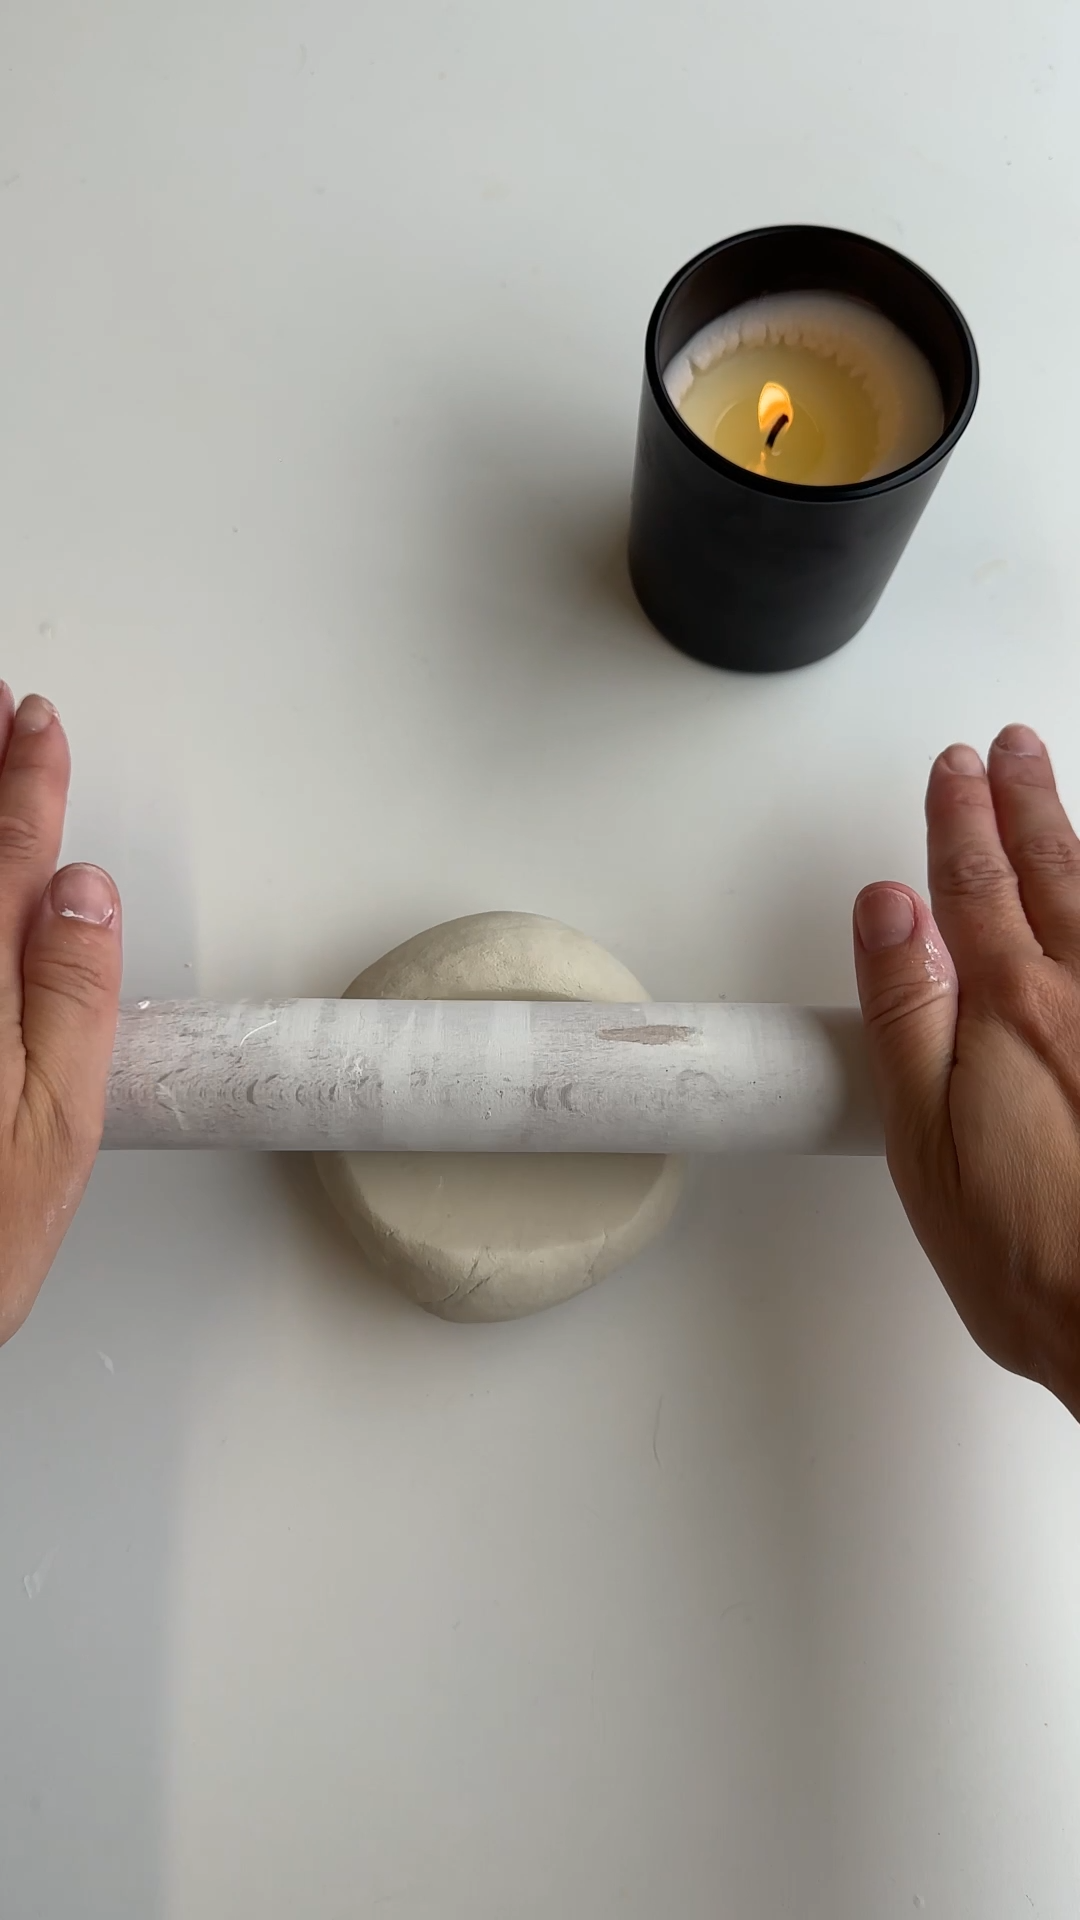
step 1: roll and cut your clay notepad
start by rolling out your air dry clay into a flat slab about 6 mm thick.
once it’s evenly rolled, use a craft knife to cut a simple rectangle shape. this will form the base of your notepad.
smooth the edges gently with a little water and your finger so they look neat.
tip: try to keep the thickness consistent across the slab so the piece dries evenly.

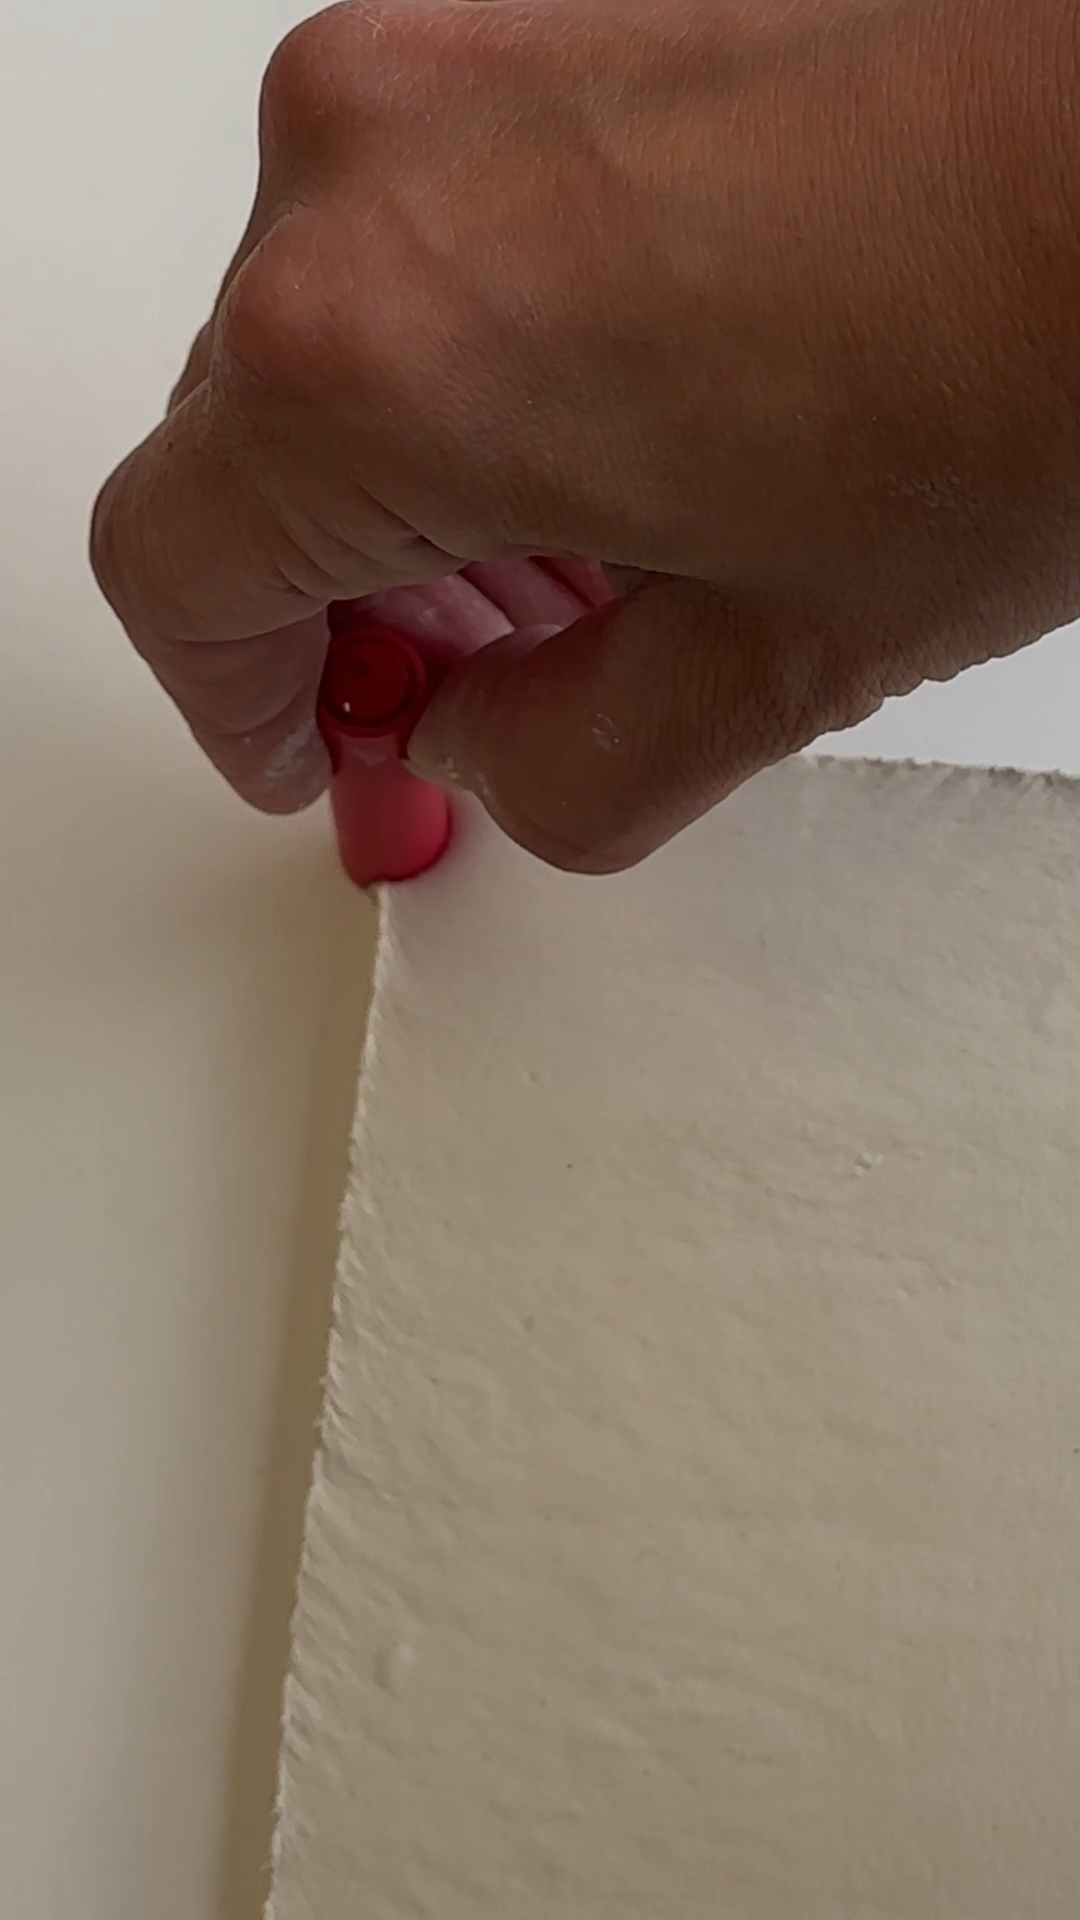
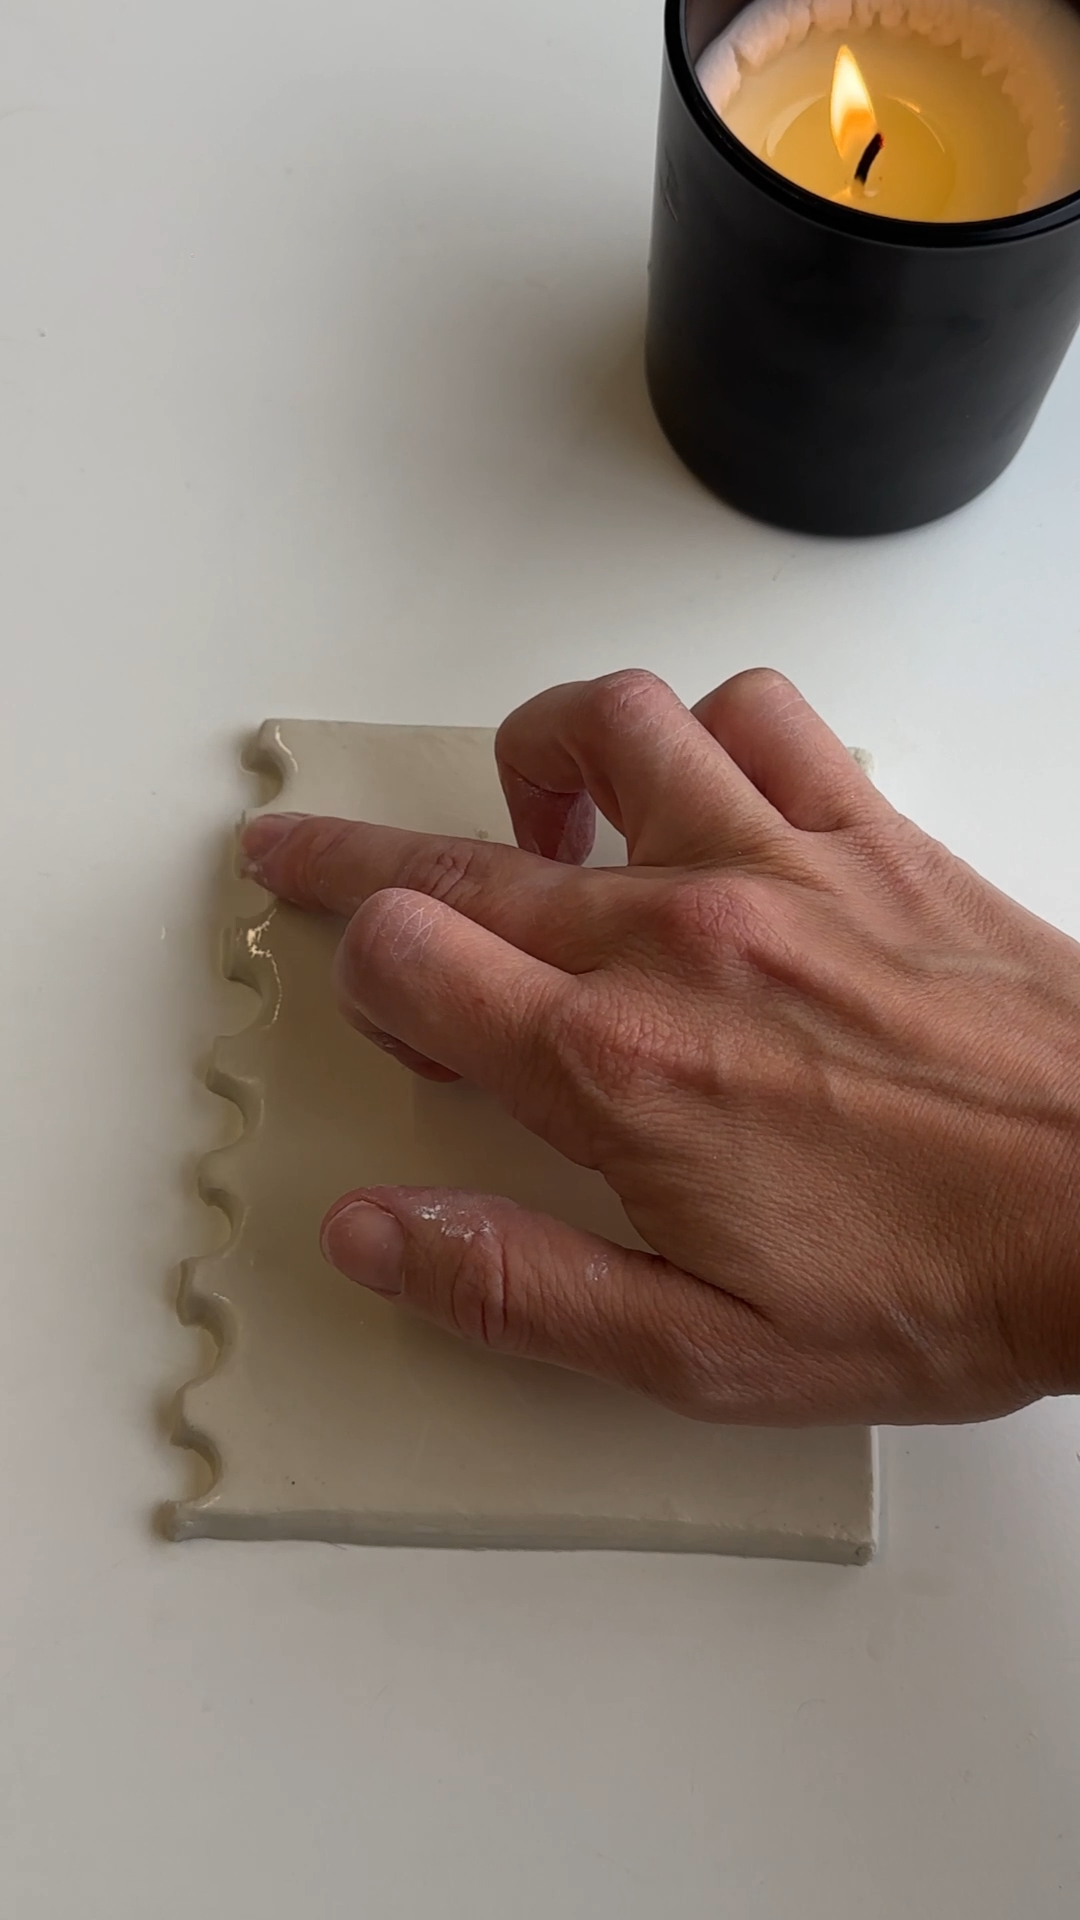
step 2: create the notebook-style edge
take a pen lid and press it gently into one side of the clay to create the little indents that mimic a spiral notebook.
work your way along the edge, spacing them evenly.
use a little water again to tidy the edges of the indents so they look clean.
step 3: leave the clay to dry overnight
leave the clay piece somewhere flat to dry overnight.
drying time can vary depending on temperature, humidity, and thickness.
once the clay feels completely hard, it’s ready for painting.
tip: If you’re new to the material, check out my guide: air dry clay: tips, tricks and ideas.
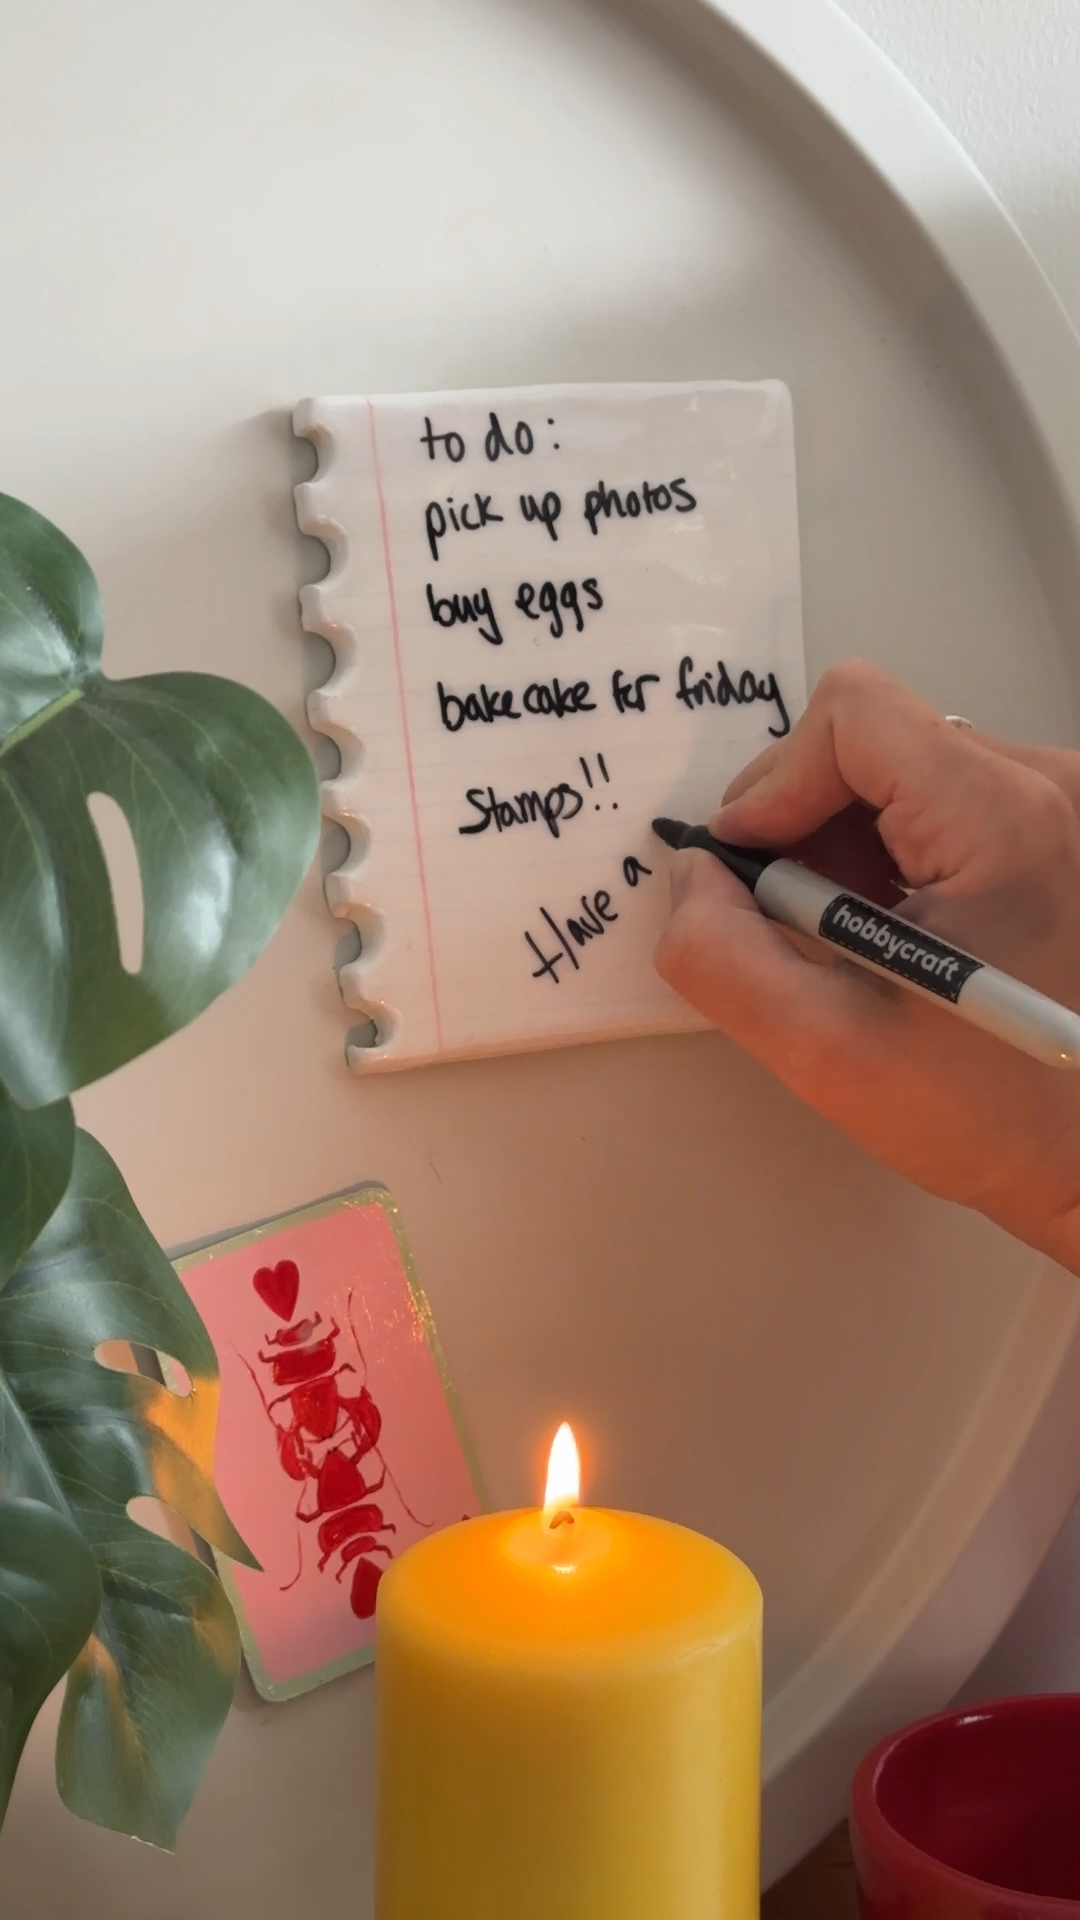
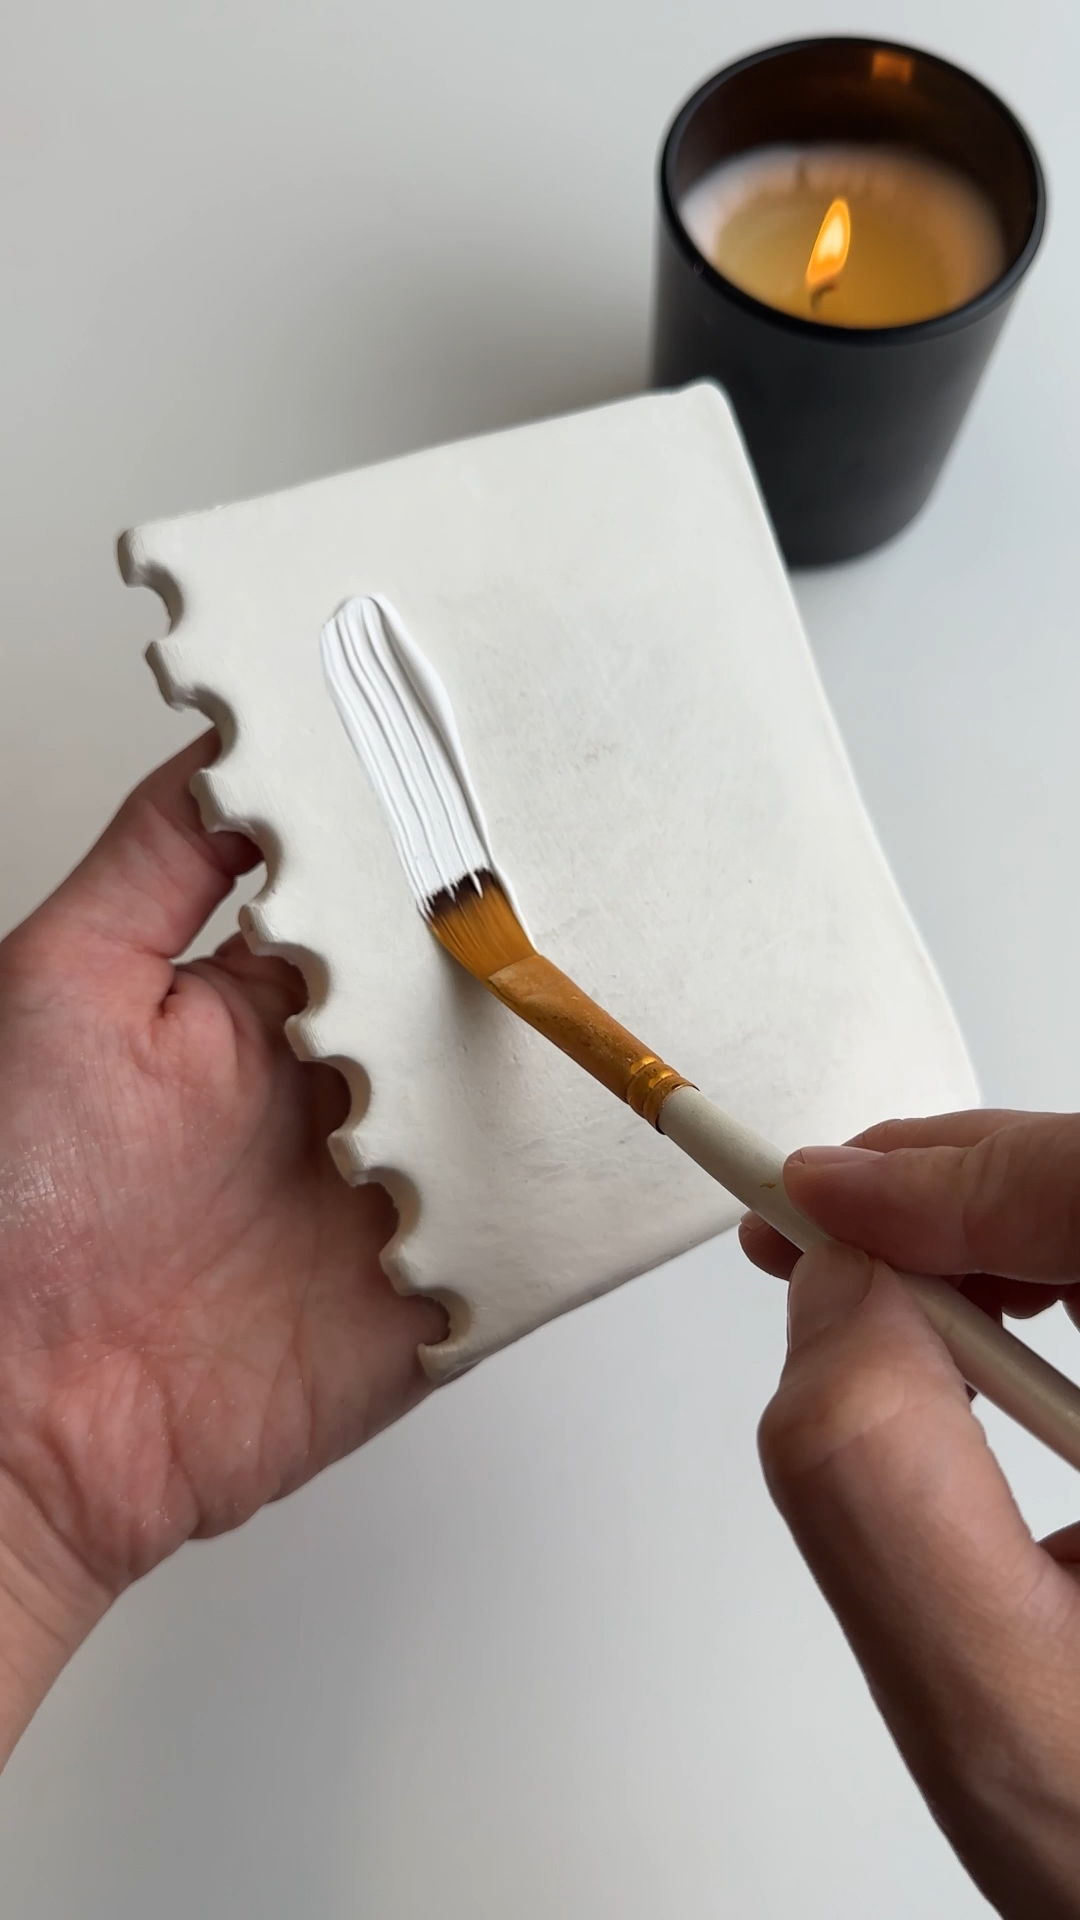
step 4: paint the notebook design
paint the entire surface white to create the base of your “paper”.
once that layer has dried, use a ruler and coloured pen to add the classic notebook details. a red margin line and light blue horizontal lines work really well.
this is the step where the piece really starts to look like a sheet of paper.
tip: keep the lines subtle so the effect stays realistic.

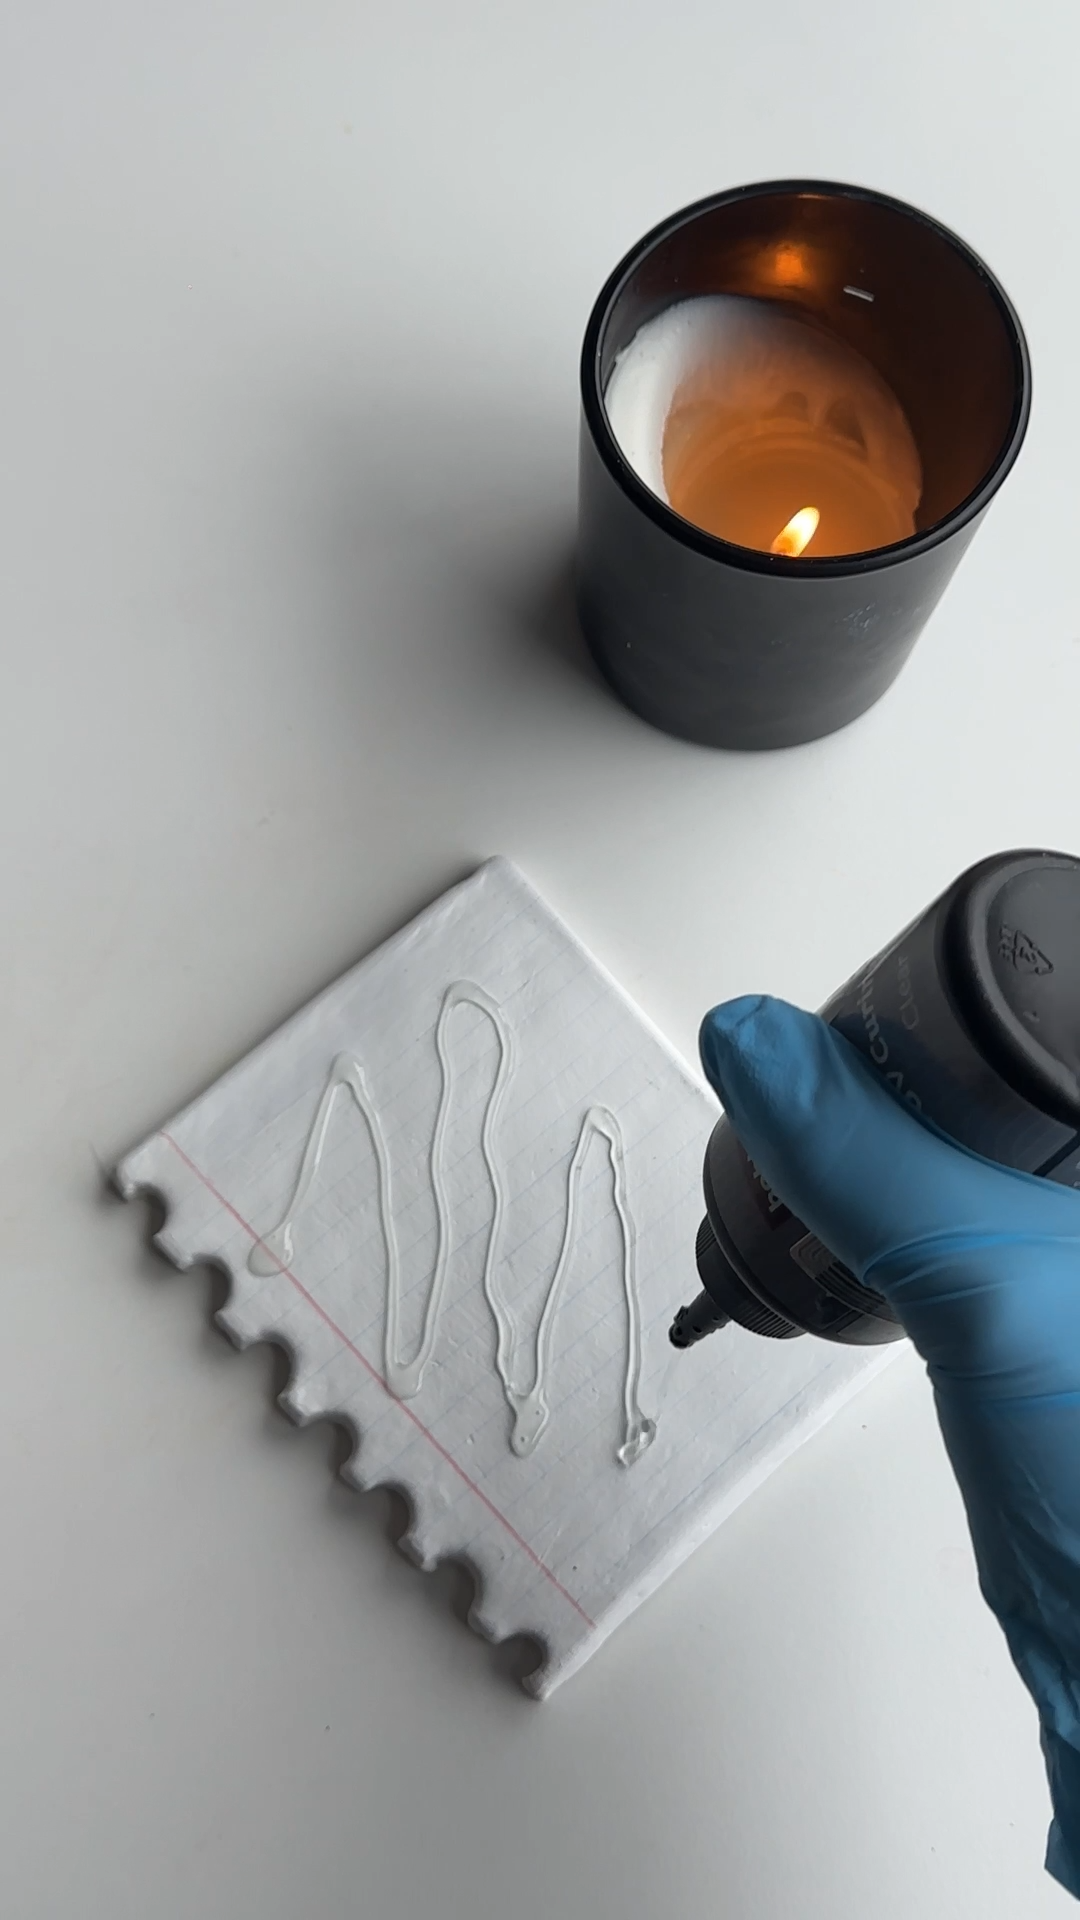
step 5: seal with resin and add magnets
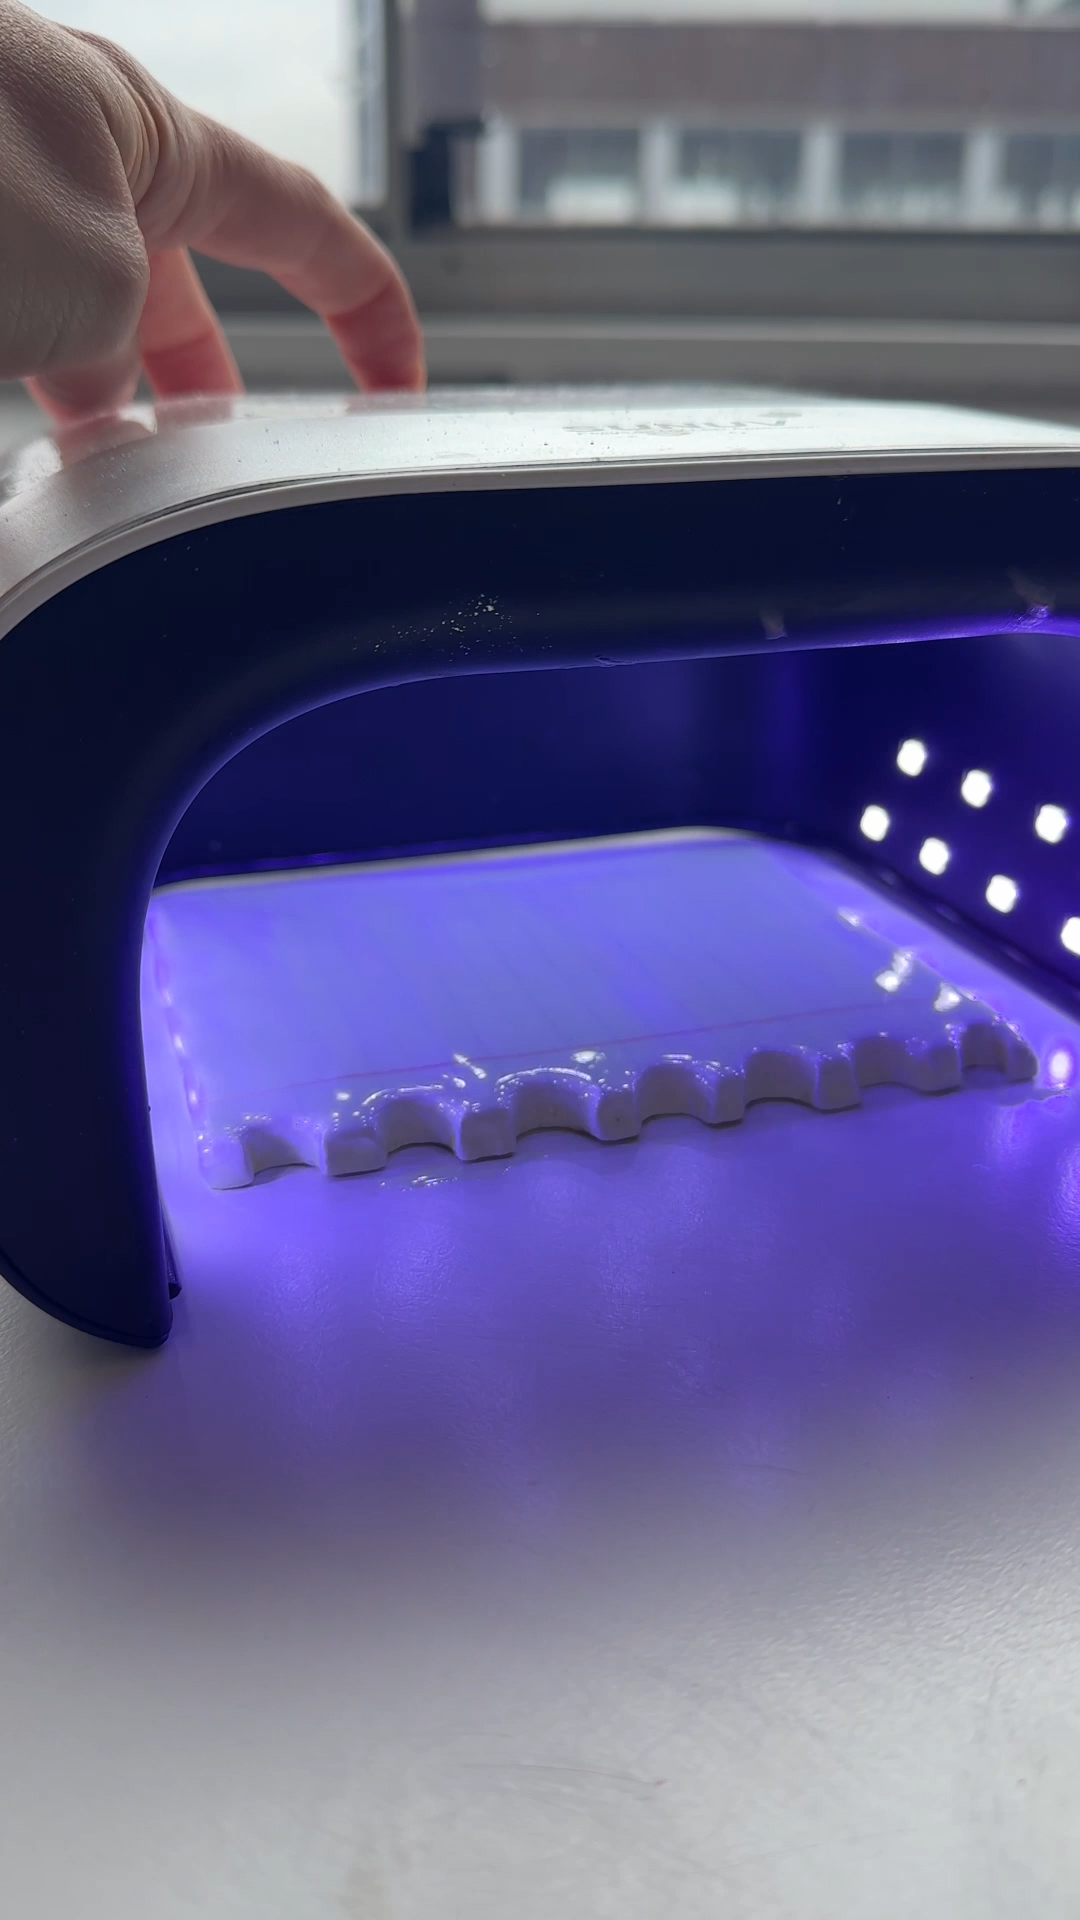
coat the surface with a thin layer of UV resin to create a smooth protective finish.
place the piece under a UV lamp until the resin fully cures.
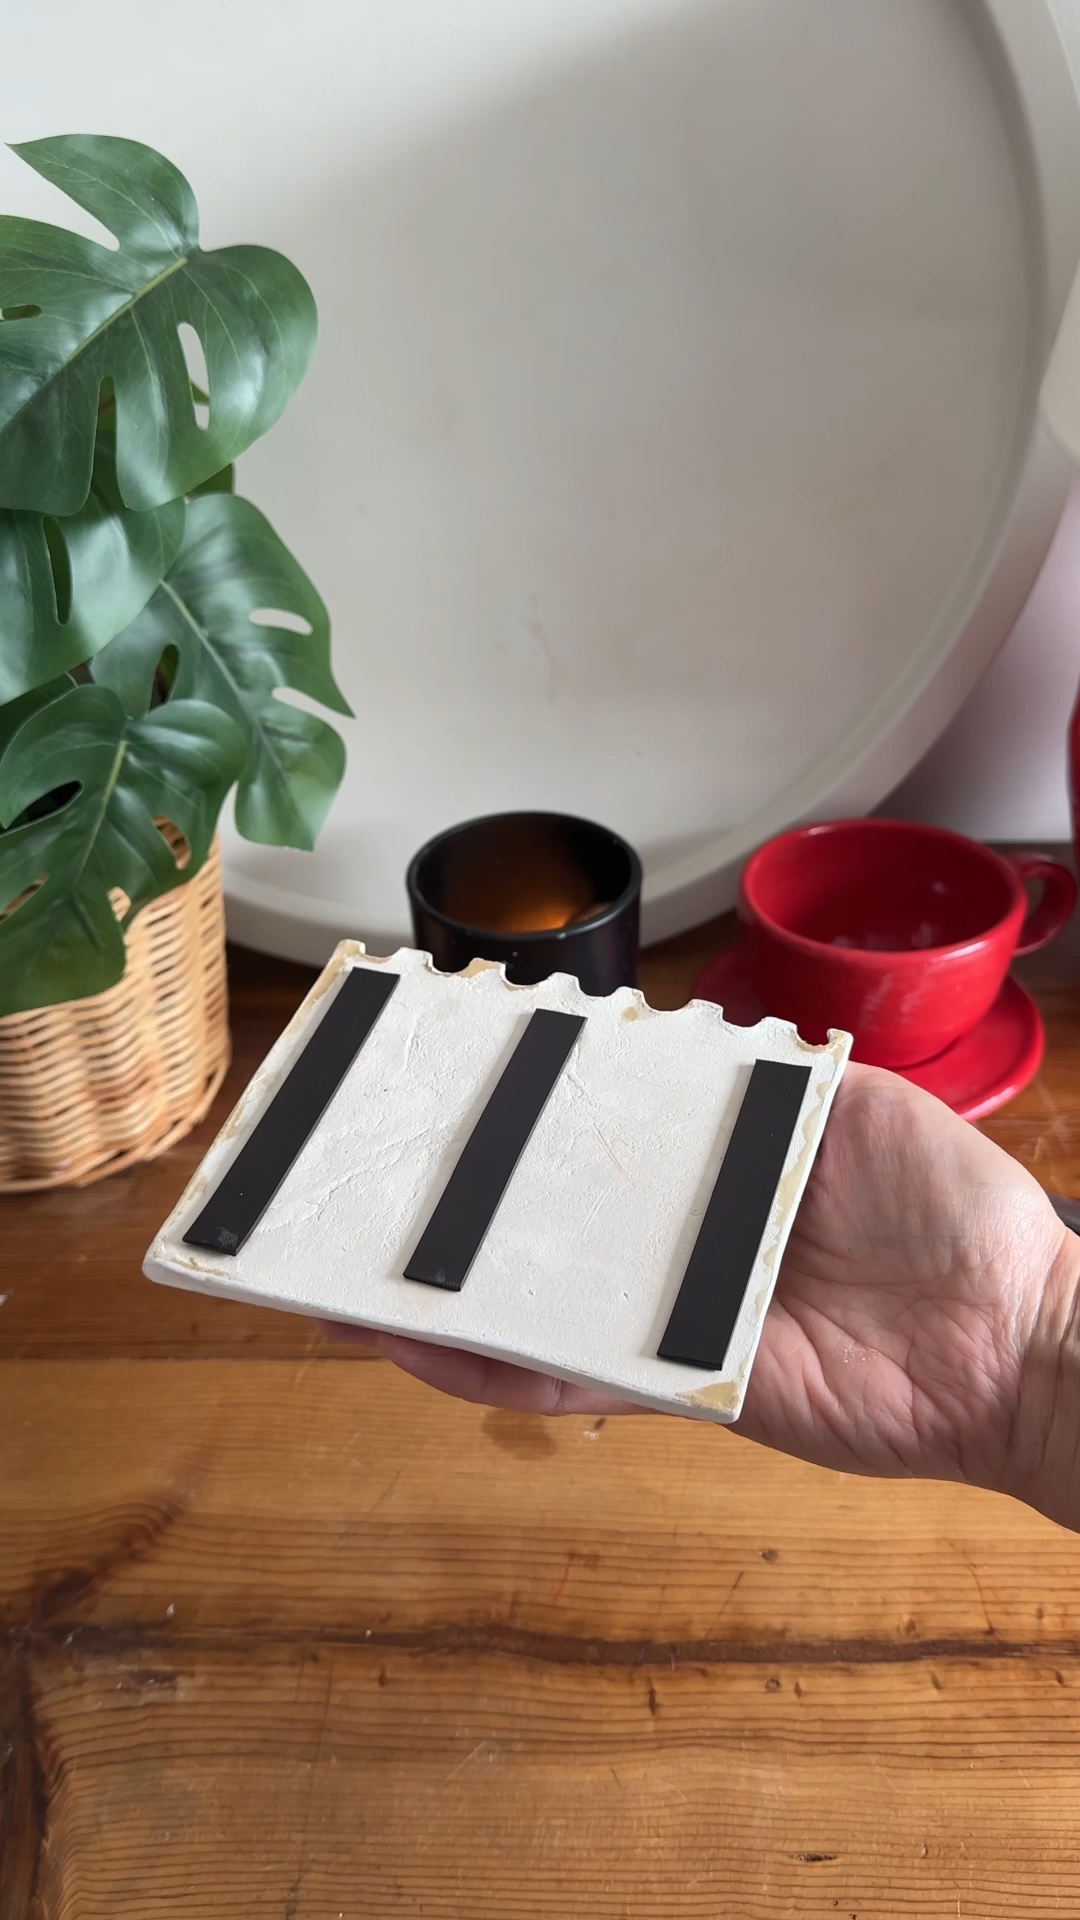
then cut three small strips of magnetic tape and glue them to the back so the notepad can stick to your fridge.
tip: make sure the magnets sit flat so the piece sticks properly.

the verdict 👩⚖️
this is one of those projects that feels almost too simple while you’re making it… and then somehow ends up being genuinely useful.
the notebook detail is what really makes it work. without the little spiral indents and the red and blue lines, it’s just a rectangle of clay. but with those small touches, it suddenly reads as a tiny sheet of paper stuck to your fridge.
the resin finish is also the game changer. it turns the piece from a decorative magnet into something you’ll actually use every day. shopping lists, quick reminders, things you keep meaning to do.
and because it’s such a simple shape, it’s also a great project to experiment with. different colours, doodles, mini versions, maybe even a full fridge set.
a small craft, but a surprisingly practical one.
most air dry clay projects take around 24 hours to dry fully, though thinner pieces may dry faster. thickness, room temperature, and humidity all affect drying time, so it’s best to wait until the clay feels completely hard before painting.
yes, resin works well as a protective finish for air dry clay. it seals the paint and creates a smooth surface that can be wiped clean. just make sure the clay and paint layers are fully dry first.
a non-permanent marker works best for this project. because the surface is sealed with resin, you can write notes and wipe them off again.
magnetic tape works well for lightweight clay pieces like this. cutting three strips and placing them across the back helps keep the notepad stable on the fridge.
• rolling the clay too thin
• rushing the drying stage
• forgetting to seal the surface if you want it to be reusable


more like this
looking for more DIY inspiration? Take a look at some other projects I've done similar to this one.
join my monthly craft club
a monthly drop of new bits, behind-the-scenes chaos, and ideas to brighten your brain. pop your email in and i’ll send you something nice