diy air dry clay light switch covers 💅
a cute entry level air dry clay project that adds instant personality to any room.
🎨 beginner-friendly - no kiln or special tools needed.
🏃fast & fun – ready in under a day (with drying time).
🌈 customisable – choose colours and shapes to suit your space.
💅 removable – command strips mean no damage to your walls.
learn how to make diy air dry clay light switch covers to add a playful handmade detail to your walls. this beginner-friendly craft turns a simple switch plate into a colourful decorative feature using just clay, paint and a little creativity.
you only need a few bits:
- air dry clay
- needle tool or craft knife
- acrylic paints - I used baby pink and dark pink
- gloss varnish or acrylic gloss sealer
- water and paintbrushes
- paper and pencil for your shape template
- command strips (or similar adhesive)
tip: air dry clay does shrink a little as it dries - so make your cover slightly larger than your switch plate to allow for that.

Welcome to my online studio of arts, crafts, and everything in between! I post regular DIY crafts here as well as on my social channels to help give everyone of every skill-level the opportunity to create beautiful, handmade gifts and decorations. If you want regular projects delivered to your inbox, use the form below, or follow me on socials!
the idea 💭
sometimes the smallest details in a room are the most fun to personalise.
light switches are one of those things you use every single day… but they’re almost always completely plain. so the idea here was simple: what if they could be a little more playful?
air dry clay felt like the perfect material for it. it’s easy to shape, beginner friendly, and you can create soft organic shapes that feel a bit more interesting than a standard square switch plate.
i’ll be honest though, i wasn’t totally sure how it would look once it was on the wall. clay projects can sometimes feel a bit bulky.
but once it was painted and attached, it completely changed the feel of the space. it’s such a small detail, but it adds a really lovely handmade touch.
and the best part? you can customise them however you like.
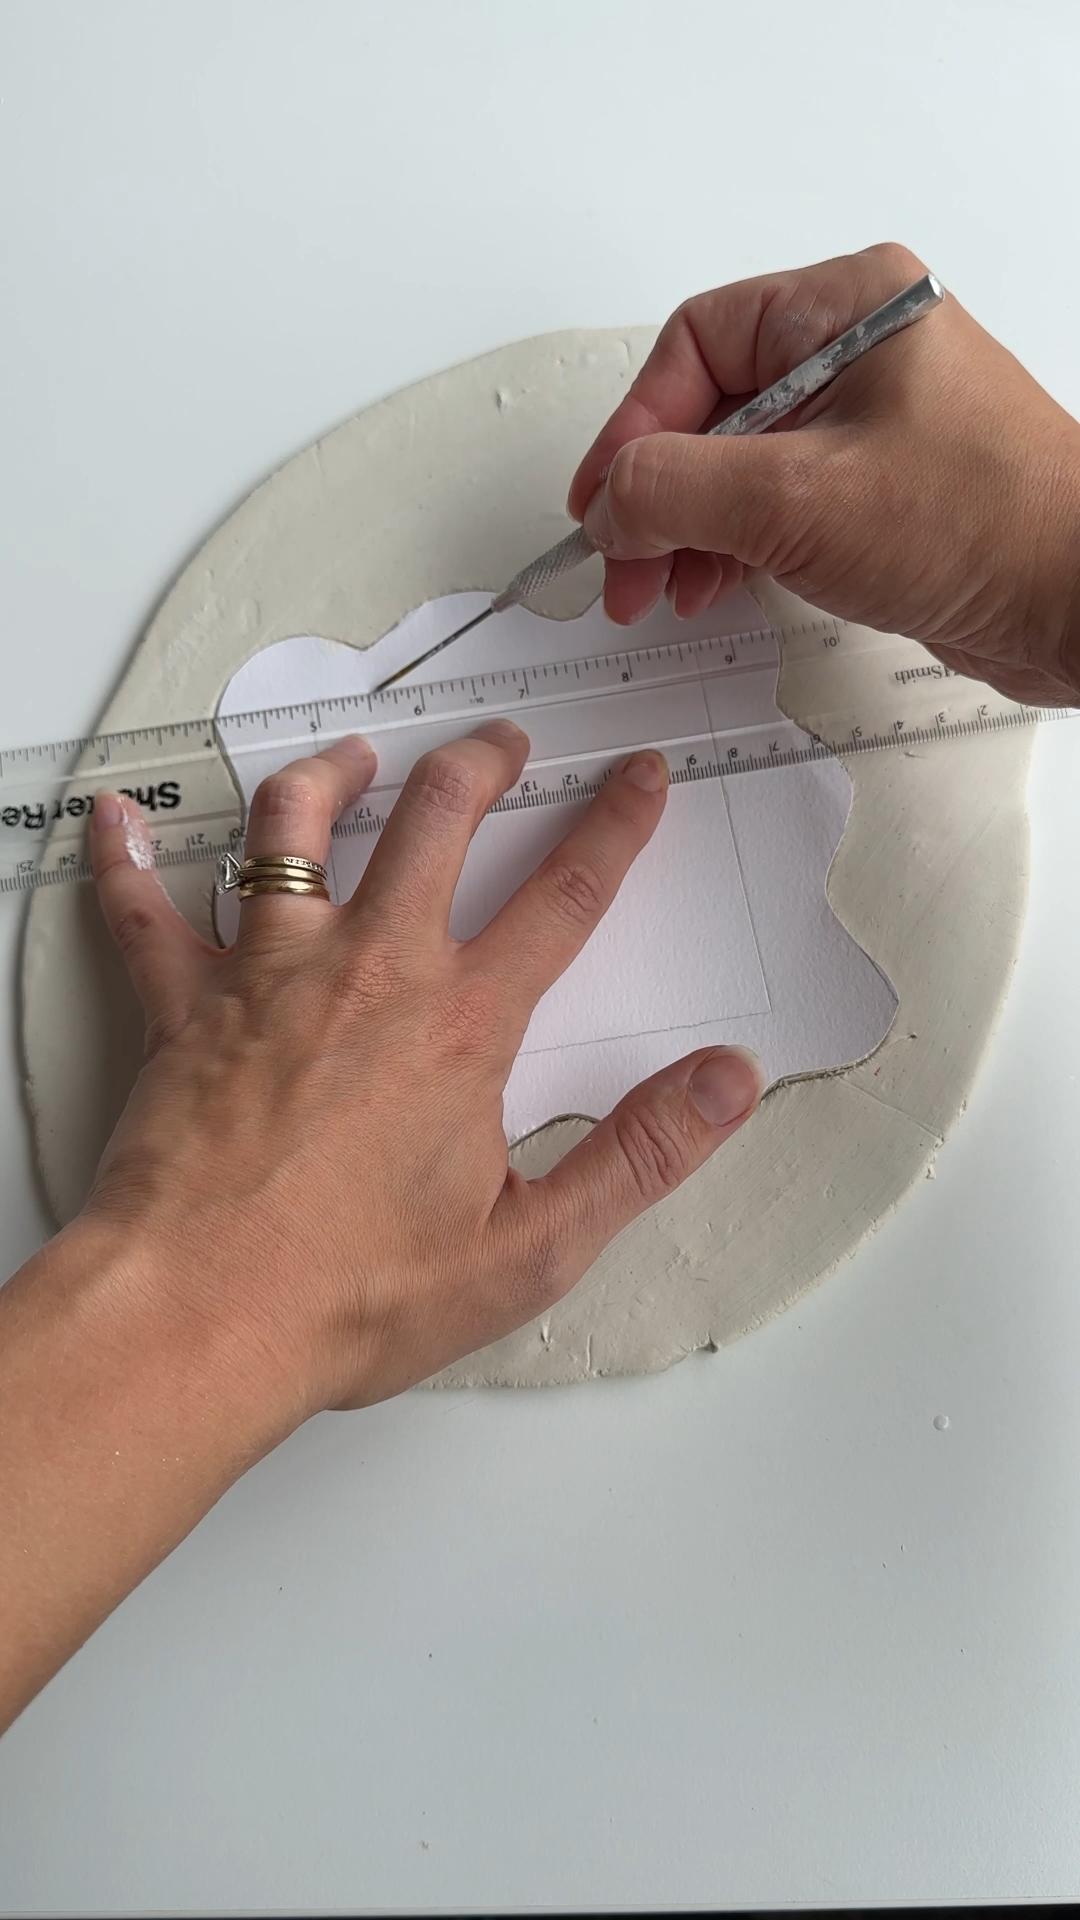
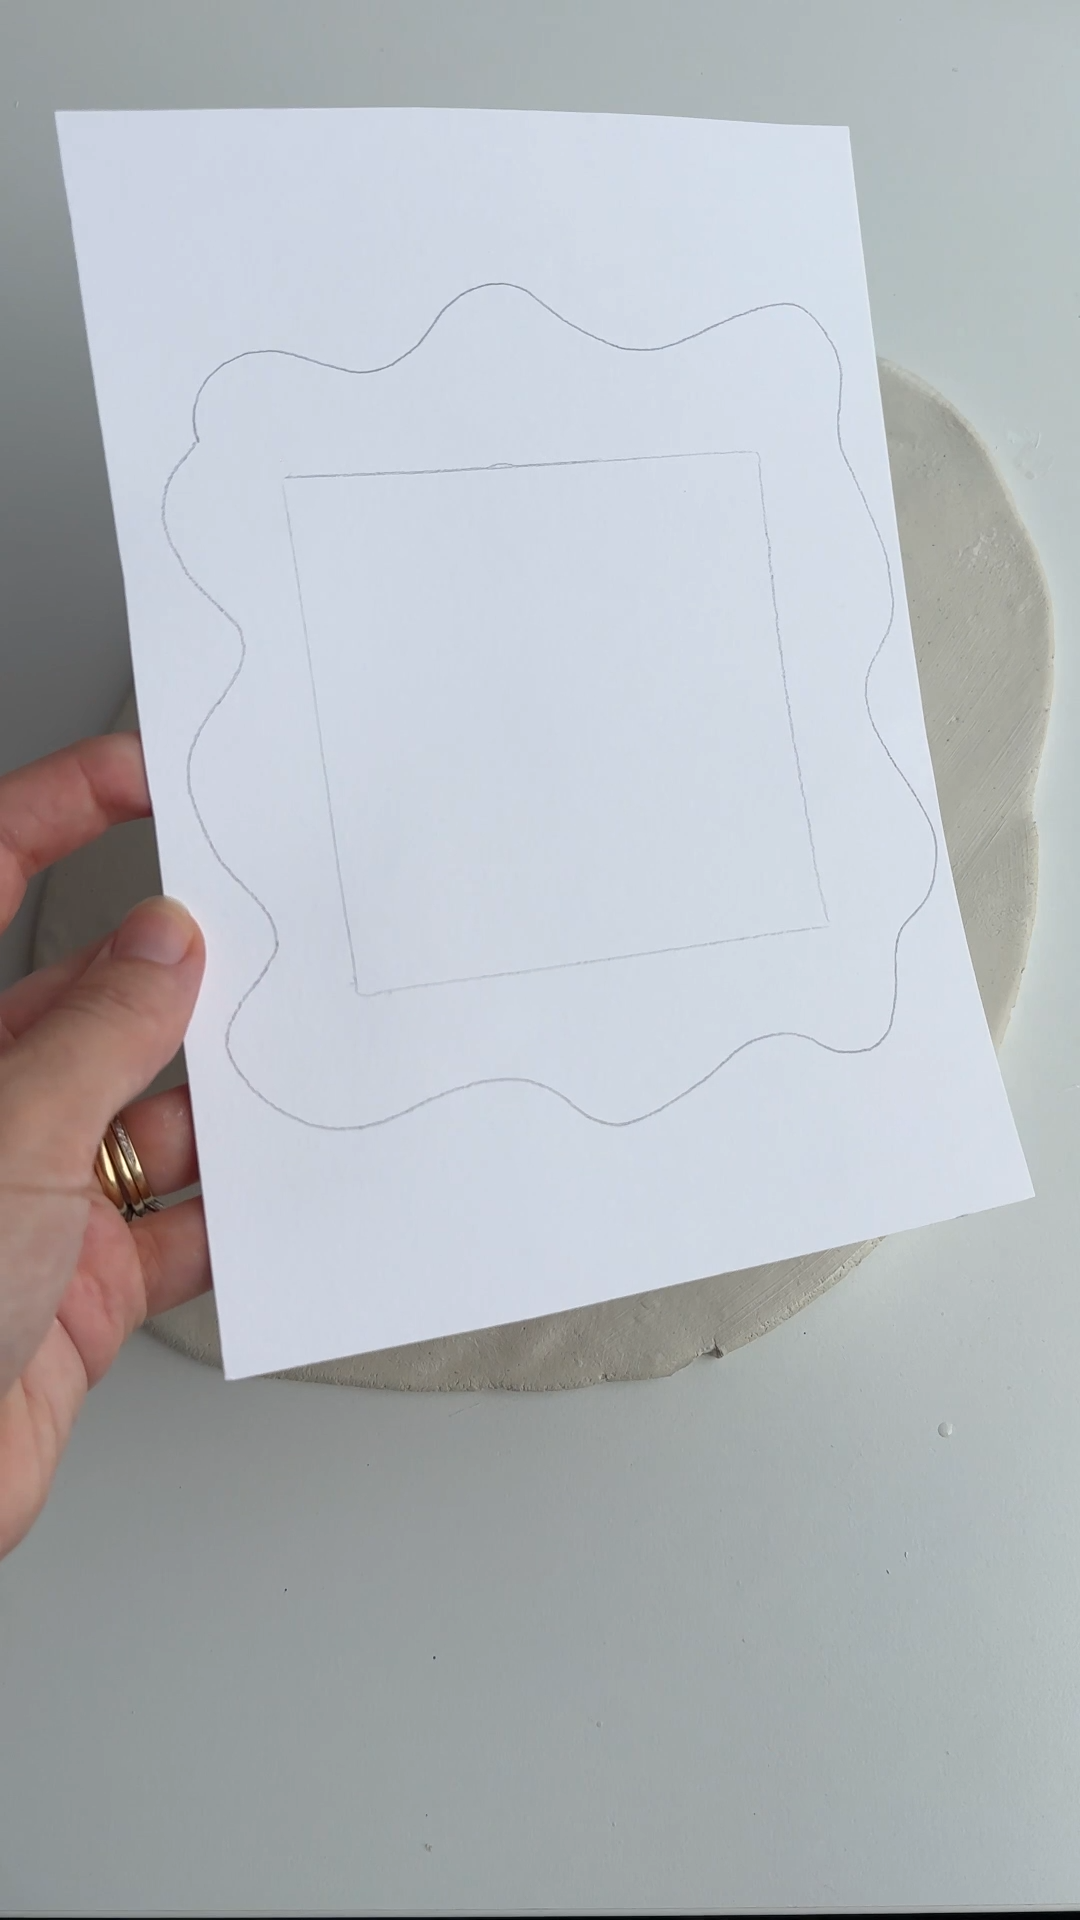
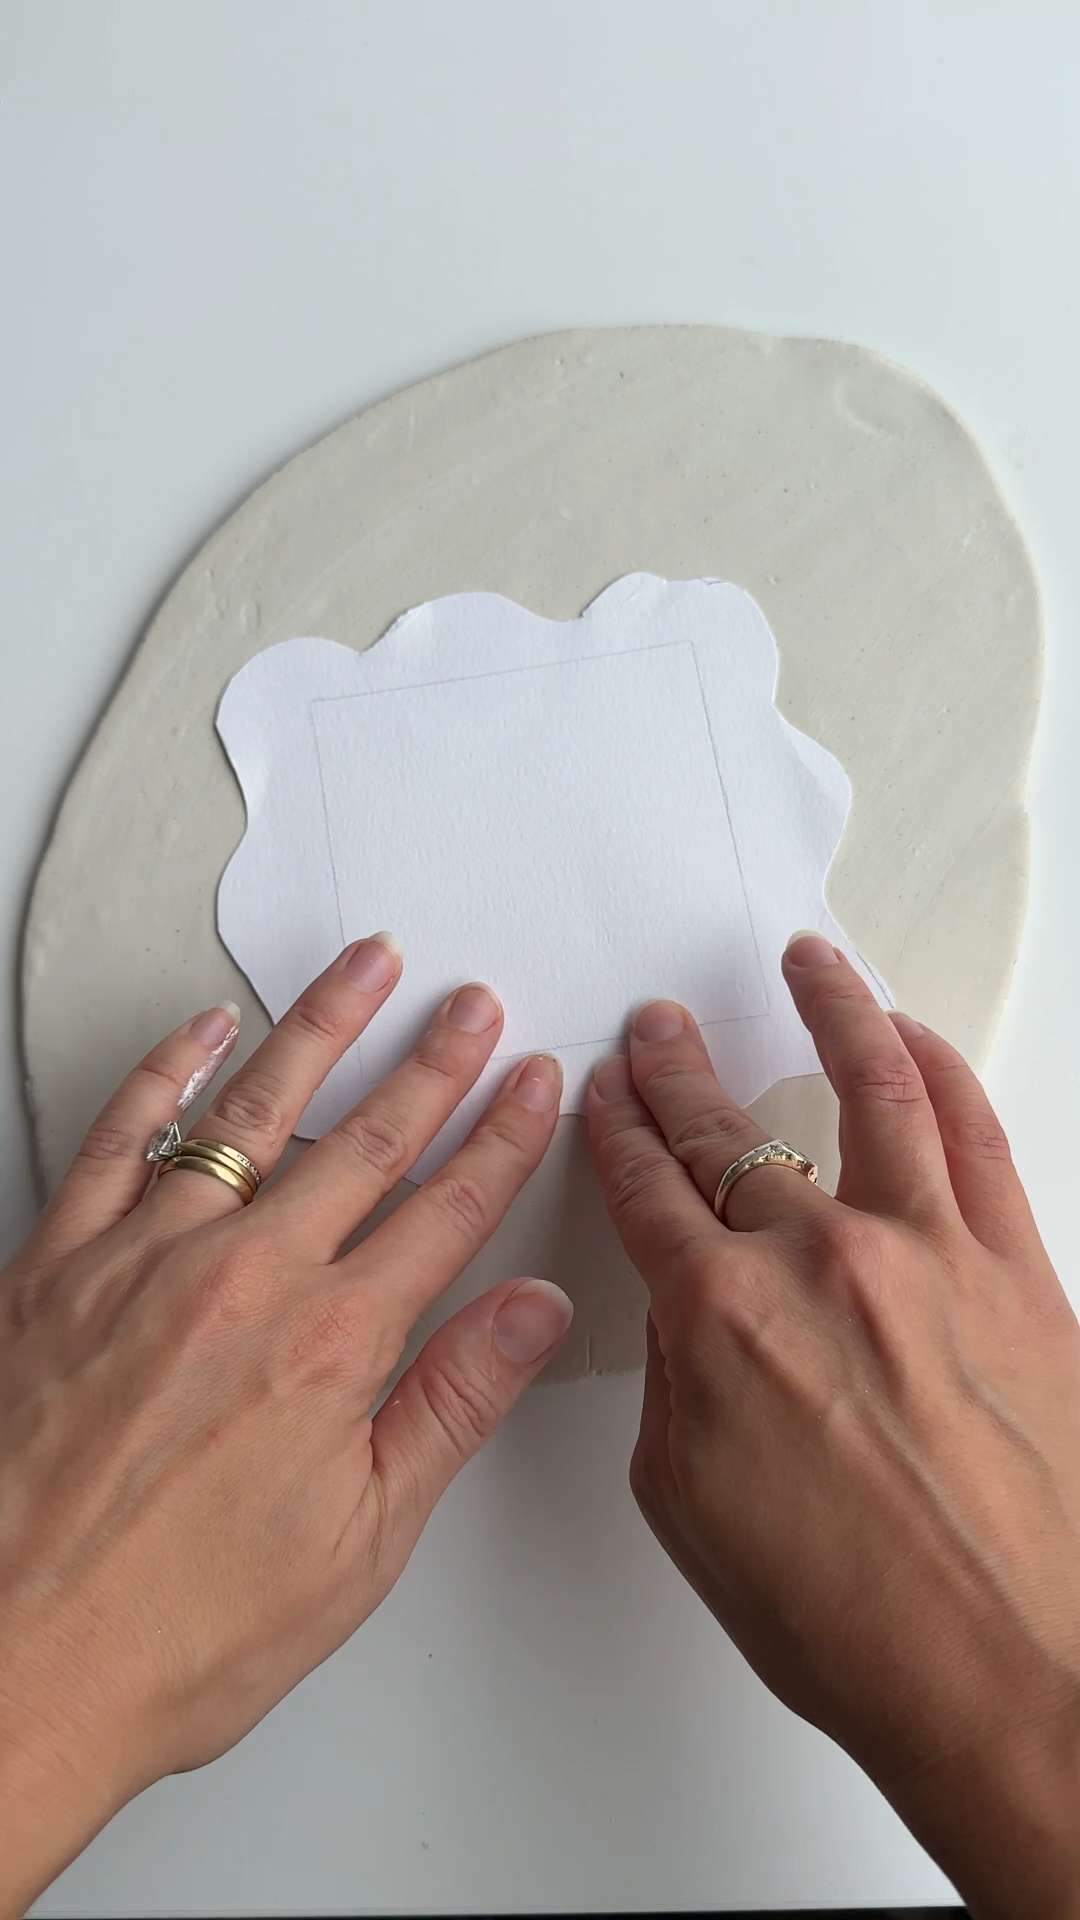
step 1: cut your clay to shape
roll out your air dry clay until it’s about 5mm thick.
draw your desired shape on paper - i went for a wavy-edged rectangle - then trace around it onto your clay using a needle tool.
cut it out carefully with a craft knife, remembering to cut the central section where your light switch will show through.
step 2: smooth and refine
dip your finger in a little water and smooth around the edges and surface.
this gives you that perfectly soft, rounded edge that makes it look polished and professional.
let it dry completely (i left mine overnight).

step 3: paint your design
once dry, it’s time for the fun part - painting!
i went with a baby pink base and added dark pink squares to create a wavy check pattern.
apply a couple of thin coats for an even finish, allowing each to dry fully before the next.
creative twist: Try polka dots, stripes, or even little flowers to match your room’s personality.

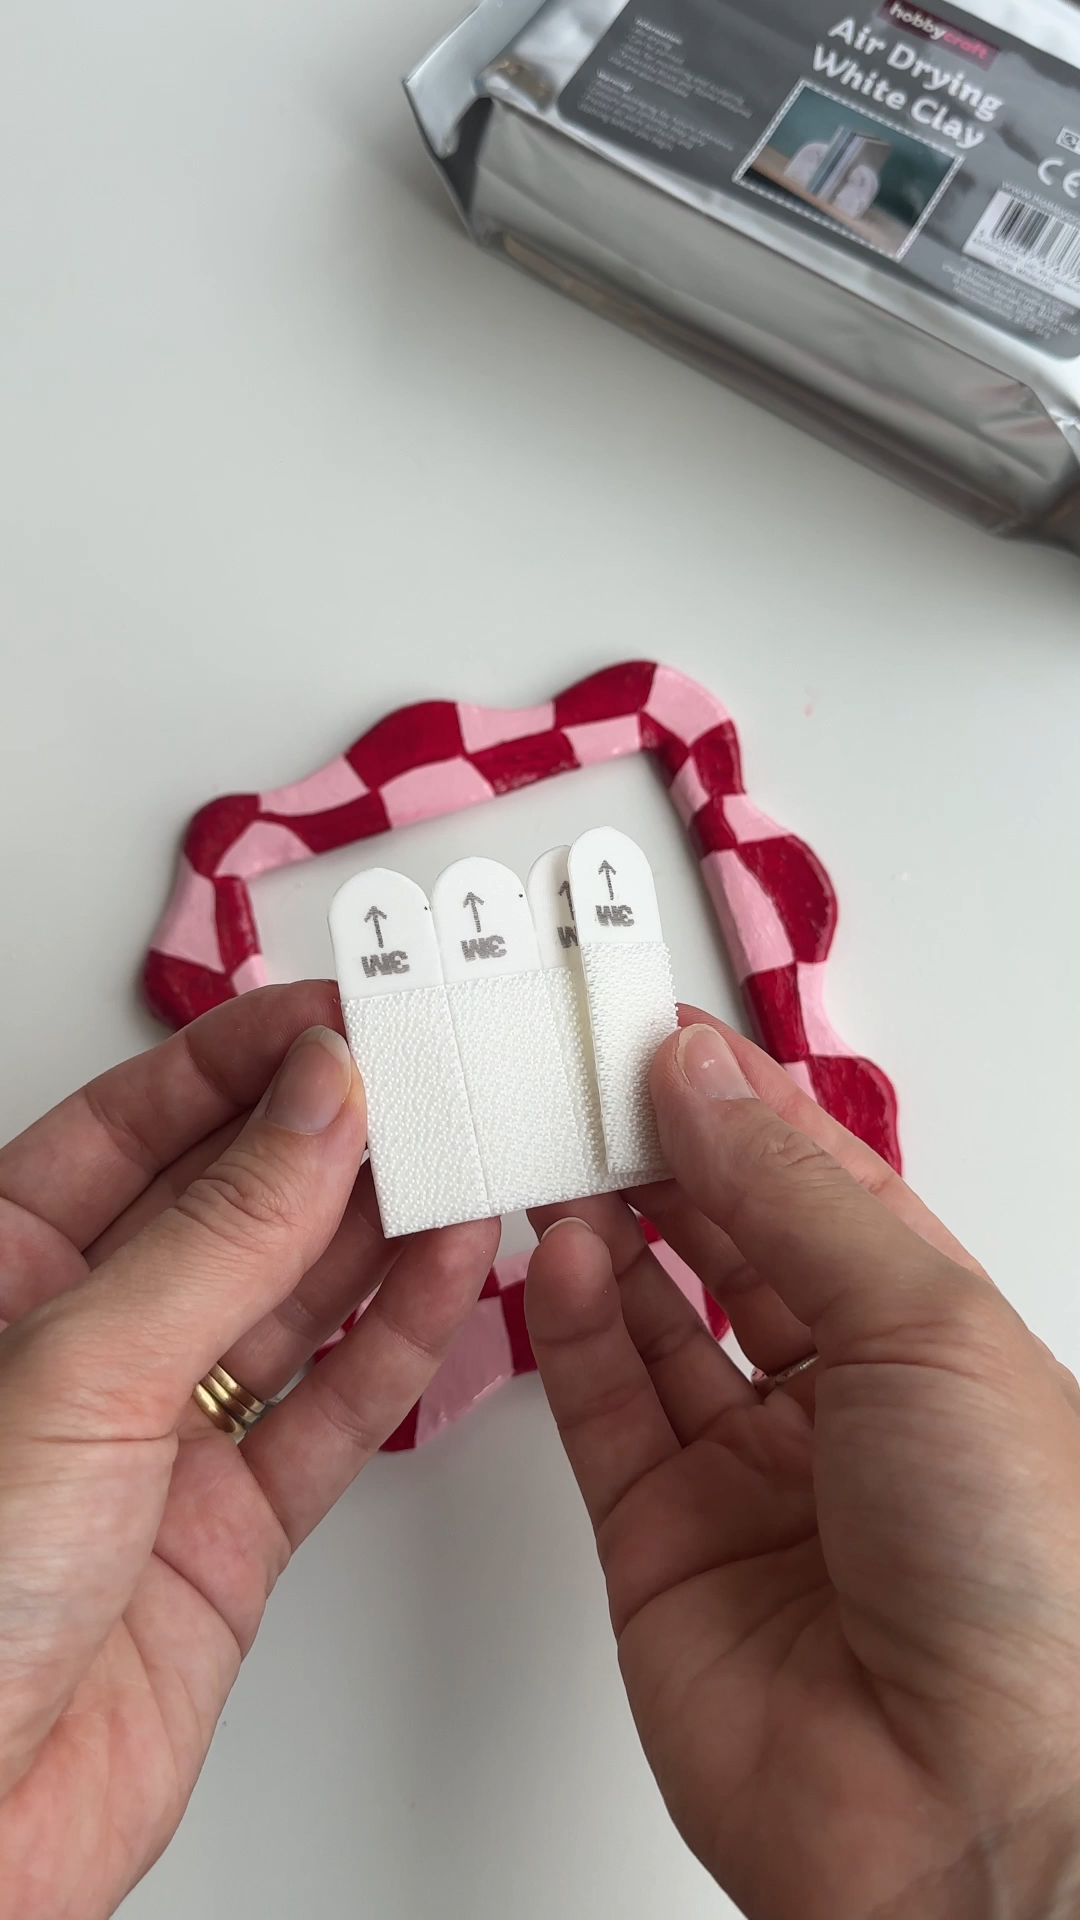
step 4: gloss & attach
once your paint is dry, brush on a layer of acrylic gloss or varnish.
this not only protects your design but gives it that satisfying shiny finish.
when it’s fully dry, stick command strips onto the back, press it onto your wall - and voilà! a joyful, handmade touch that instantly brightens one of the more boring aspects of your walls.

the verdict 👩⚖️
this is one of those projects that proves small details can make a big difference.
light switches are something we use every day, but they’re usually completely forgettable. adding a handmade clay cover suddenly turns them into a tiny design feature instead.
it’s also a really satisfying beginner project. the shape is simple, the painting is fun, and you can customise the colours to match any room.
and because they attach with command strips, you can easily swap them out later if your style changes.
a small craft, but one that adds a lovely handmade touch to your space.
yes, air dry clay works really well for decorative switch covers because it’s lightweight and easy to shape. once sealed with varnish or gloss, it becomes durable enough for everyday use.
most air dry clay projects take 24–48 hours to dry fully, depending on thickness and room conditions. thinner pieces may dry faster, while thicker shapes can take a little longer.
no. this project works as damage-free wall decor because the clay cover is attached using command strips, which are designed to remove cleanly without marks.
apply a small command strip to the back of the clay cover, press it firmly onto your existing light switch plate, and hold it in place for about 30 seconds so the adhesive bonds properly.
if you ever want to remove it, gently pull the command strip tab downward. the adhesive stretches and releases without damaging the wall or the switch plate.
common mistakes to avoid
• rolling the clay too thin
if the clay slab is too thin it can warp or crack while drying. aim for an even thickness so the shape stays strong.
• removing the clay before it’s fully dry
air dry clay needs time to harden properly. moving or attaching it too soon can cause bending or soft edges.
• skipping the sealing layer
adding gloss or varnish protects the paint and makes the surface easier to clean, especially on something you’ll touch every day like a light switch.


more like this
looking for more DIY inspiration? Take a look at some other projects I've done similar to this one.
join my monthly craft club
a monthly drop of new bits, behind-the-scenes chaos, and ideas to brighten your brain. pop your email in and i’ll send you something nice